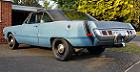
Used to be Blue's Valiant
Moderator: Moderators

My swap meet rad just needed some ally angle brackets welding to the sides and it bolts in, sorry bling fans it's getting painted black. After trimming, the standard bottom hose fitted right on. Haven't sorted a top hose yet, will post the part numbers for both when I have.
- Attachments
-
- IMG_0903.JPG (115.07 KiB) Viewed 1644 times
Fuel lines were a bit of a mess of mismatched parts, so replaced it all with -6 back to the pump. Filter is tucked away under the alternator, fitted a proper set of wire separators as well as a new module in the dizzy which had died, hopefully that was the cause of the misfire it's had since I got it.
- Attachments
-
- IMG_0906.JPG (101.7 KiB) Viewed 1569 times
-
- IMG_0902.JPG (112.76 KiB) Viewed 1569 times


Anyway, more stuff, I had odd window crank handles neither of which looked right, I spotted a 60's style set on a friends Beetle, and as they match my steering wheel I thought that's what I want. I bought a pair off ebay realising that it was unlikely they'd fit, but that's what I wanted so somehow I'd make 'em work. First job was to strip out the spindle from one of the rear windows that I wasn't using to get a better Idea of what I was dealing with.
The new crank needed to be countersunk to fit on the spindle, so that was the first job. The crank had the right size hole but a different spline, so following advise from Trev, I ground the end of the spindle flat to form a cutting edge and pressed it into the crank on a hydraulic press to cut a new set of splines. Sorted, now it fitted but how to retain it? I wanted to use the hidden grub screw like the VW but that wouldn't work in this application. So, 5mm button head fasteners were use which meant tapping out the spindle to suit. fair bit of work but I'm happy with the result, and they're a bit lighter too...
The new crank needed to be countersunk to fit on the spindle, so that was the first job. The crank had the right size hole but a different spline, so following advise from Trev, I ground the end of the spindle flat to form a cutting edge and pressed it into the crank on a hydraulic press to cut a new set of splines. Sorted, now it fitted but how to retain it? I wanted to use the hidden grub screw like the VW but that wouldn't work in this application. So, 5mm button head fasteners were use which meant tapping out the spindle to suit. fair bit of work but I'm happy with the result, and they're a bit lighter too...
- Attachments
-
- 2.jpg (165.53 KiB) Viewed 1468 times
-
- 1.JPG (98.81 KiB) Viewed 1468 times
-
- IMG_0939.jpg (137.81 KiB) Viewed 1373 times
Last edited by Blue on Mon Apr 28, 14 7:08 pm, edited 1 time in total.
Great looking mod.....amazing how much of a big effect the little things can have!!! 
Dave Tildesley.....MMA-081
72 Dodge Dart
73 Plymouth Duster - SOLD
I wanna go so FAST i think i'm going to DIE!..........Then i'll shift into second!
"My Car is a work in progress, Probably never gonna get finished, never gonna have the money to Bananarama!!"
72 Dodge Dart
73 Plymouth Duster - SOLD
I wanna go so FAST i think i'm going to DIE!..........Then i'll shift into second!
"My Car is a work in progress, Probably never gonna get finished, never gonna have the money to Bananarama!!"

-
autofetish
- Posts: 5599
- Joined: Sat May 21, 11 6:43 am
The problem with small blocks is they have the distributor in the wrong place, jammed up under the wiper motor. So, time to move it, I used an Astra Mk3 wiper motor easily available for about £20 from ebay. First step is to cut a piece of MDF, dab of grease on the mounting studs marks it so you can drill the mounting holes. Some long bolts will allow you to square up the old wiper motor, dab of grease on the spindle marks it's position on your MDF. You now have a datum to measure from to position the new wiper motor in the correct position to line up with the original linkage. Folding up a sheet metal bracket with the correct mounting pattern for the new motor is the next step.
- Attachments
-
- 4.JPG (97.26 KiB) Viewed 1356 times
-
- 3.JPG (113.12 KiB) Viewed 1356 times
-
- 2.JPG (123.34 KiB) Viewed 1356 times
-
- 1.JPG (105.86 KiB) Viewed 1356 times
You can now drill out the spot welds holding the old mounting bracket and discard. Bolt in your wooden jig from the engine side and trim your new bracket until it fits up square to your jig and weld it in. You need to make a new wiper arm half Astra half Mopar, keeping the length the same as the original mopar arm.
- Attachments
-
- 8.JPG (88.26 KiB) Viewed 1346 times
-
- 7.jpg (150.97 KiB) Viewed 1346 times
-
- 6.jpg (156.82 KiB) Viewed 1346 times
-
- 5.JPG (101.68 KiB) Viewed 1346 times