Used to be Blue's Valiant
Moderator: Moderators

I had to get Dave 999 to figure out how to work the Astra wiper motor from a toggle switch as it has weird park wiring, a couple of relays sorted that out, cheers Dave! Made up a panel to hold the wiper, horn,washer switches and an oil pressure gauge, this is a temporary fix for now. Well pleased with the results and I saved 2lbs into the bargain...
- Attachments
-
- 12.JPG (99.37 KiB) Viewed 1863 times
-
- 11.jpg (159.46 KiB) Viewed 1863 times
-
- 10.JPG (97.97 KiB) Viewed 1863 times
-
- 9.jpg (139.45 KiB) Viewed 1863 times
Last edited by Blue on Thu May 08, 14 7:50 pm, edited 1 time in total.
It was me who questioned the sale of your old bits Blue.
Now I know why.
Great idea to move it all inboard to create room for working on the engine.
And save a bit of weight !!!
You can always empty the bag for racing as well !
Now I know why.
Great idea to move it all inboard to create room for working on the engine.
And save a bit of weight !!!
You can always empty the bag for racing as well !
It's all about Smiles per gallon !!!
68 Coronet sedan 500 4 door
Dodge Ram SRT 10
MMA-013
68 Coronet sedan 500 4 door
Dodge Ram SRT 10
MMA-013
-
autofetish
- Posts: 5599
- Joined: Sat May 21, 11 6:43 am
Made a battery tray that also holds the other electrical gubbins I need to have in the boot. The battery is a power vamp gel which has a hefty output for it's size, then there's an alternator cut off solenoid, fuel pump relay and circuit breaker and the master shutoff switch.
- Attachments
-
- IMG_0995.JPG (118.05 KiB) Viewed 1744 times
-
- IMG_0967.jpg (169.5 KiB) Viewed 1744 times
-
- IMG_0966.JPG (98.65 KiB) Viewed 1744 times
Front bumper brackets, they weigh 4 fifths of not a great deal so I think that's light enough. Bumper is a very used fibreglass item which will be fine when I've repaired it, it's held on by 4 Dzus fasteners, and the whole shooting match weighs a little under 3 lbs, so that's a 25lb saving over the original item. I also replaced the solid steel wing stays with ally tube.
- Attachments
-
- IMG_0984.JPG (112.5 KiB) Viewed 1740 times
-
- IMG_0991.JPG (90.23 KiB) Viewed 1740 times
-
- IMG_0990.jpg (125.88 KiB) Viewed 1740 times
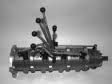
Denso alternator fitted, needed a spacer and a custom offset pulley for everything to line up, Trev can now supply these parts, just need to wire it up now, in fact a general tidy up of under hood wiring is long overdue. Fan, catch can and rad all fitted back in, need to find a suitable top hose next.
- Attachments
-
- IMG_0997.JPG (100.35 KiB) Viewed 1735 times
-
- IMG_0976.JPG (100.88 KiB) Viewed 1735 times
-
dustymopar

- Posts: 1448
- Joined: Tue Aug 01, 06 6:39 pm
- Location: Chelmsford
-
comeonsasha

- Posts: 145
- Joined: Tue Mar 26, 13 11:27 am
- Location: mark lives in Angmering
- Contact:
-
shovelheadrob
- Posts: 959
- Joined: Tue Sep 18, 12 10:27 am
Fixed Lexan rear side windows in. All attempts to bend the lexan over the original glass and get it to take a set failed miserably. I resorted to fitting it into the original rubbers and wedging in plastic pegs from the back to force it into the correct profile. I then carefully masked up the frame and the lexan leaving just the gap where the rubbers and window whiskers are, I filled that with black mastic and smoothed it off before removing the tape. I left it a couple of days then removed the pegs, it's fixed and retained it's shape so job done.
- Attachments
-
- IMG_1003.JPG (91.65 KiB) Viewed 1438 times
small stuff you can do in the oven. i think 160 (you will need to experiment as too high the lexan will bubble) degrees is the temprature it will go soft.
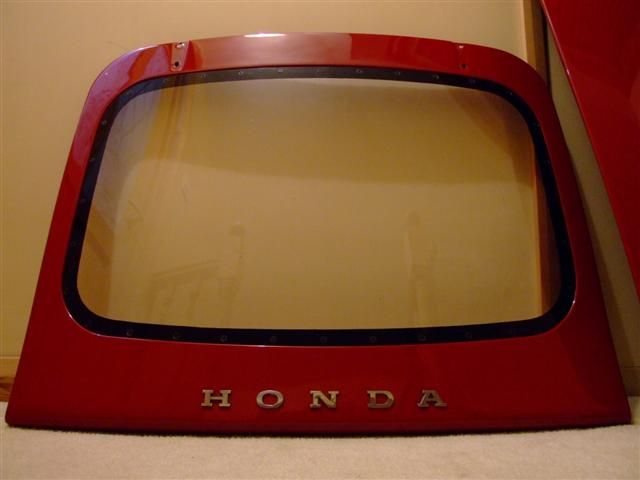
i did the S800 rear screen by just bolting a flat sheet to the tailgate and it took the natural shape.
lots of nut serts and countersunk allen bolts. doesn't cost much with ebay stuff.
i'm still waiting for your pictures of the hollowed out bolts and hollow bolt heads to save some more weight great work so far 
i did the S800 rear screen by just bolting a flat sheet to the tailgate and it took the natural shape.
lots of nut serts and countersunk allen bolts. doesn't cost much with ebay stuff.
i'm still waiting for your pictures of the hollowed out bolts and hollow bolt heads to save some more weight