Page 4 of 32
Posted: Fri Jul 31, 15 7:00 pm
by ScottyDave
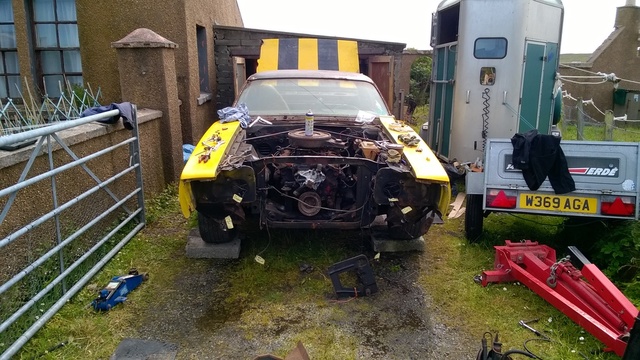
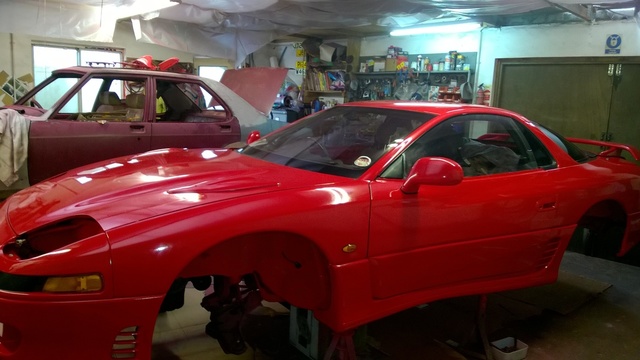
This part Miles
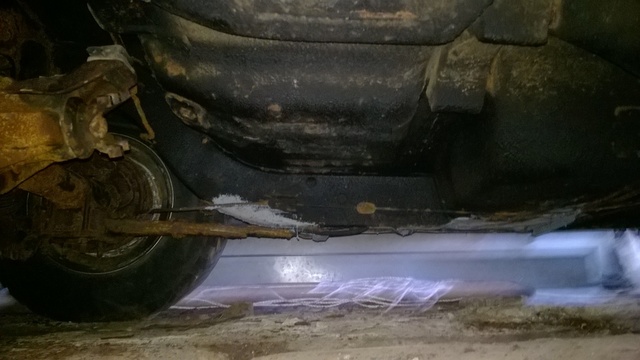
there is a lot of rot in the bulkhead behind the engine, hopefully pull the motor this weekend and get a decent look...
Posted: Fri Jul 31, 15 7:14 pm
by ScottyDave
MilesnMiles wrote:Dave, have. A very close look at the bulkhead. Especially where the wipers mount as that can be a place where water gathers and rusts through. Some of the yanks see that as a deal breaker area for rust
Bet they've never had the challenge of fixing cars in the Hebrides, we grew up bringing back wrecks from the death...

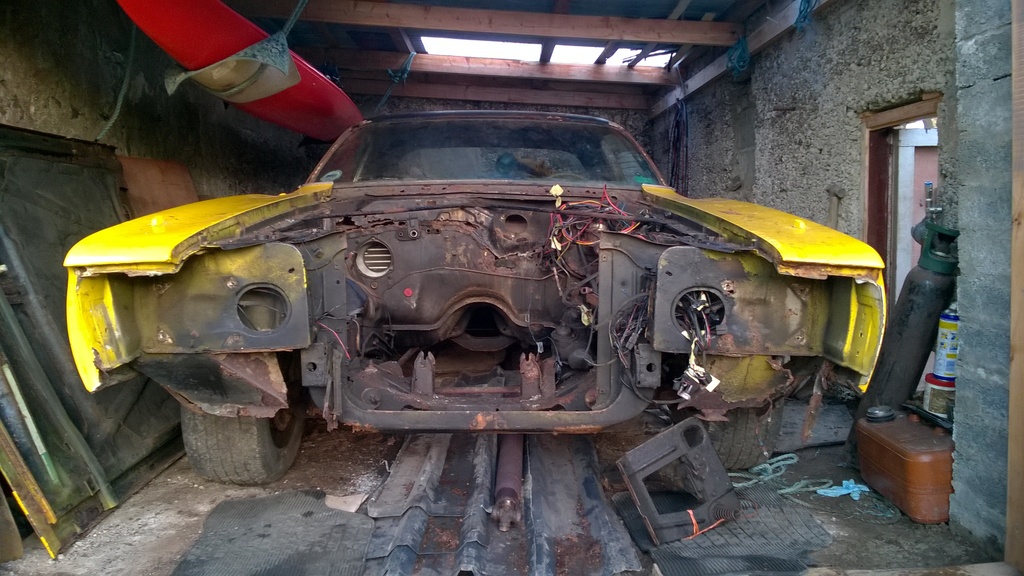
I'll get it stripped-down and see how much and where the rot is, then we can make a decision... but I'll expect the worst anything else is a bonus

Posted: Fri Jul 31, 15 7:34 pm
by MilesnMiles
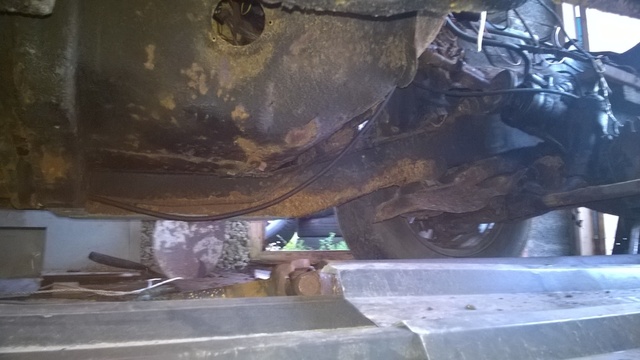
Fair play mate, pull those plastic grills off by the wipers and check the bowl area below, especially drivers side.
Posted: Sun Aug 02, 15 1:03 am
by TW71
Good advice there.
The compartment gets a build-up of leaves and crud over the years and the drain holes get blocked, plus they rarely had any paint in there!
Don't let it put you off Dave

Posted: Tue Aug 04, 15 6:38 pm
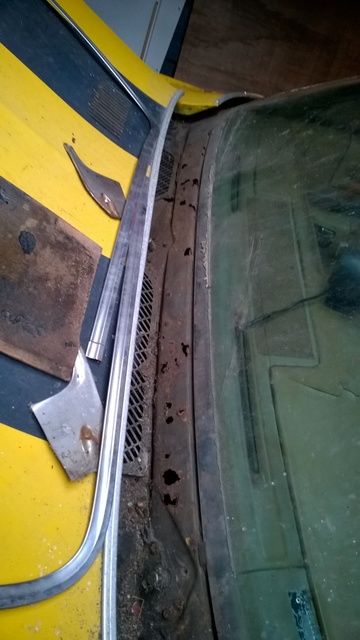
by ScottyDave
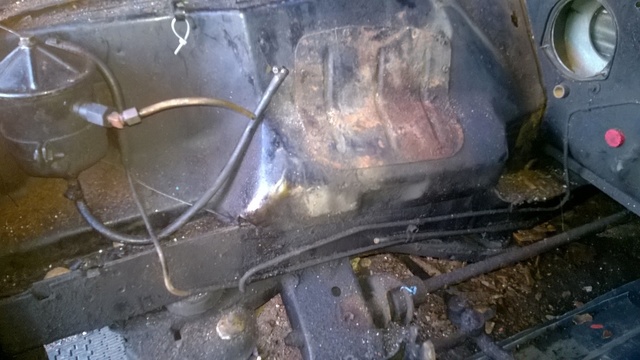
Posted: Tue Aug 04, 15 7:56 pm
by MilesnMiles

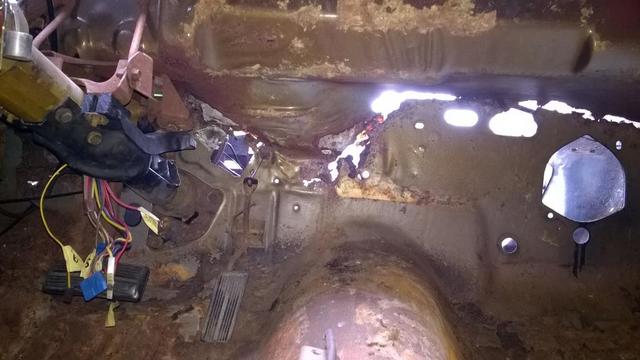
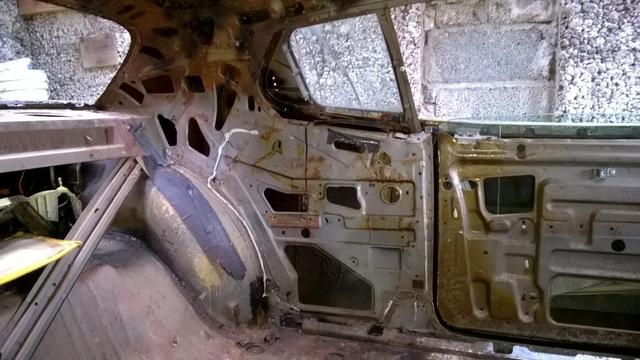
wow that bulkhead is nasty. Is it recoverable, Dave?
Posted: Tue Aug 04, 15 8:51 pm
by latil
Screen out,dash/heater out,that will mend

Posted: Tue Aug 04, 15 10:49 pm
by ScottyDave
MilesnMiles wrote: wow that bulkhead is nasty. Is it recoverable, Dave?
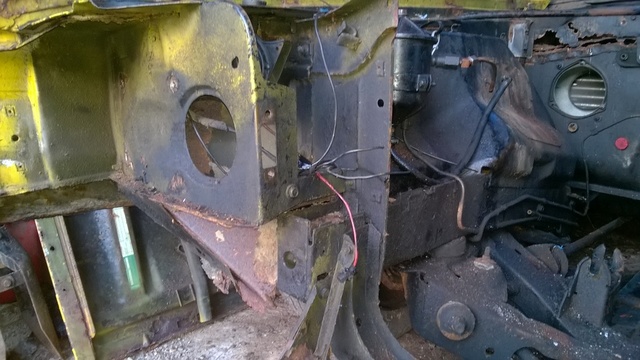
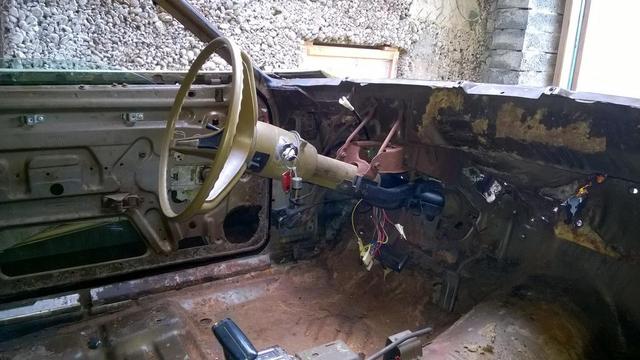
Pretty sure it is Miles, base of the cowl bowls is fine.
latil wrote:Screen out,dash/heater out,that will mend
That was a nerve-racking night, took the screen out which we discovered is not the original as someone had bonded it to the dash as well...
Dash and heater tomorrow
Posted: Wed Aug 05, 15 7:46 am
by latil
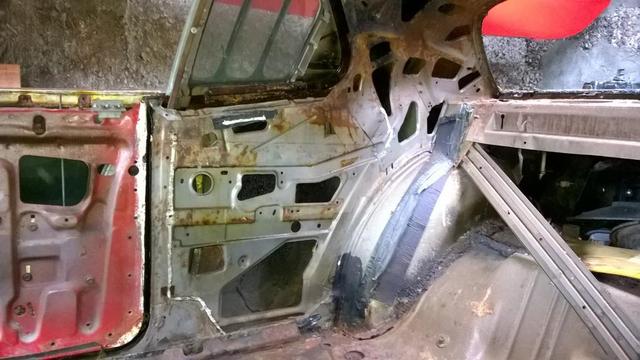
Lots of photos,card templates,take your time and that will be the worst over,everything else will seem simple.
Posted: Wed Aug 05, 15 12:41 pm
by TW71

Always the first thing to go the bulkhead / firewall, I have seen ones like that even more than 30 years ago, water trap and bare metal .
I know Paul500 who used to be on here had one from a 71 charger for sell as I had the inner wings off him but was years ago. He
may still have it.
Posted: Wed Aug 05, 15 11:10 pm
by Steve
Loving this thread matey
You have lots of space by the looks of it so nice and steady and she will come together. Im with Blue on these projects...I start something and make sure I Bananarama! before hitting the next job. I have dry day and wet day jobs lined up (I do everything on the car outside on the drive). Wet days I can paint stuff up in the garage before reassembly etc so there is always something to get on with.
We are all watching and enjoying your build....you are not alone!
Cheers Steve
Posted: Thu Aug 06, 15 9:12 am
by MilesnMiles
Quite right Steve. Always finish one job however difficult and then move one ticking it off the list. Always feels better to accomplish something. Also, make sure time is available so no need to rush or bodge it.
Good luck
Posted: Thu Aug 06, 15 9:16 am
by MilesnMiles
Dave, before dis assembling the heavy stuff (suspension etc) get some of this and spray it everywhere. It is the dogs!
http://www.oneillvintageford.co.uk/acat ... icant.html
Also keeps moisture out. I use it as temporary under seal. Spray it into every cavity or bare metal and it will protect it. Renew once a year.
Posted: Sun Aug 09, 15 10:04 pm
by ScottyDave
Posted: Tue Aug 11, 15 9:27 pm
by ScottyDave
Didn't find a build sheet when taking the interior out except possibly the remains of it under the back seat.
I did take a photo of the Fender Tag
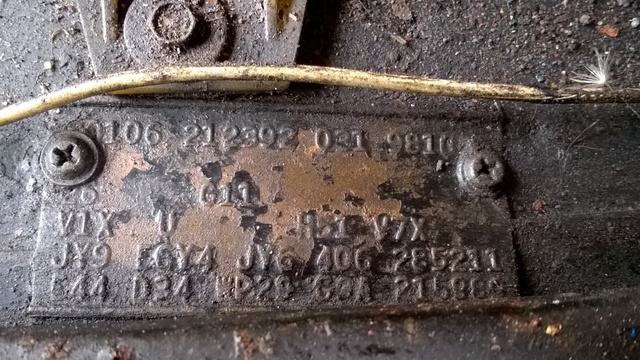
used a decoder on mymopar tonight, here's the result,
WP29:
Dodge Coronet,Charger
Premium
2 Door Sports Hardtop
G3A: 318 150HP(net) or 170HP(net) 1-2BBL 8 CYL
1973
Lynch Road, MI, USA
215980: Sequence number
E44: 318 cid 2 barrel V8 230hp
D34: Light Duty Automatic Transmission
JY9: Dark Gold Poly Exterior Color
F6Y4: Trim - Luxury, Vinyl Bucket Seats, Gold/Black
JY6: Gold Poly Int. Door Frames
406: Build Date: April 06
285211: Order number
V1X: Full Vinyl Top, Black
U: USA Specifications
H51: Air Conditioning with Heater
V7X: Accent Stripes, Black
26: 26in Radiator
G11: Tinted Glass (all)