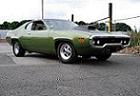
db's 66 Belvedere ***FOR SALE***
Moderator: Moderators


For Edelbrock Indy 6076 head (stamped D0285)...
1x valve guide (this one's urgent!)
1x 2.05 stainless inlet valve.
5" x 11/32" stem, twin groove.
Set of 16 spring retainers.
(Spring o/d is 1.5".
id of outer spring is 1.12".
id of inner spring is 0.69")
Set of 16 locks.
(old ones are 7*, general opinion seems to be 10* are safer)
Set of 16 teflon valve seals.
Set of special length pushrods.
Ball & cup,
5/32" stem.
7.5" overall length (7.44" measured from inside of cup to end of ball)
Maybe cut-to-length like Mancini ones?
If you need any more info, pics, etc let me know
No-one will believe you...
-
Les Szabo
don't want to confuse you Paul but are these the heads you have?
http://usaperform.com/indyedelbrock-hif ... p-998.html
note it says offset rockers, your ports look very straight at the sides, you can only do that withoffset rockers like my old T/A's.
add......ok, maybe not?
Les
http://usaperform.com/indyedelbrock-hif ... p-998.html
note it says offset rockers, your ports look very straight at the sides, you can only do that withoffset rockers like my old T/A's.
add......ok, maybe not?
Les

I will see what I can dodb wrote:For Edelbrock Indy 6076 head (stamped D0285)...
1x valve guide (this one's urgent!)
1x 2.05 stainless inlet valve.
5" x 11/32" stem, twin groove.
Set of 16 spring retainers.
(Spring o/d is 1.5".
id of outer spring is 1.12".
id of inner spring is 0.69")
Set of 16 locks.
(old ones are 7*, general opinion seems to be 10* are safer)
Set of 16 teflon valve seals.
Set of special length pushrods.
Ball & cup,
5/32" stem.
7.5" overall length (7.44" measured from inside of cup to end of ball)
Maybe cut-to-length like Mancini ones?
If you need any more info, pics, etc let me know
Those look identical Les except the casting numbers on mine are 6076Les Szabo wrote:don't want to confuse you Paul but are these the heads you have?
http://usaperform.com/indyedelbrock-hif ... p-998.html
note it says offset rockers, your ports look very straight at the sides, you can only do that withoffset rockers like my old T/A's.
add......ok, maybe not?
Les
No-one will believe you...
-
pete walton

- Posts: 1401
- Joined: Mon Jan 16, 12 4:18 pm
Try these mate ,,, if i was you i would run them up to them and let them get on with it ,they will source the valves as well http://www.performanceunlimited.co.uk/
Jesus saves but satan does that thing with his tongue you like
-
Anonymous
I made up the last couple of sections and finished tacking the inner arch today. I drew a grid on the good side and transferred the measurements onto this side. It's pretty damn close now 
I trimmed most of the waste off the new outer but it's gonna need a LOT of fettling to get it to fit and look ok
I trimmed most of the waste off the new outer but it's gonna need a LOT of fettling to get it to fit and look ok
- Attachments
-
- Arch, outer cut to shape.jpg (191.45 KiB) Viewed 1001 times
-
- Arch, inner tacked.jpg (182.84 KiB) Viewed 1001 times
No-one will believe you...
Well I reckon I'm as proud of this job as any I've achieved on this car!!
I've had several goes over the last couple of weeks at getting this crappy arch section to resemble the original and to fit the hole I made.
Each time ended in frustration and misery as I felt I was eiether getting nowhere or making it worse!
I cut it to shape with 1/2" overlap, then used my home-made stamp to re-shape the lip. This of course distorted the whole damn panel even worse than it was
I had the bright idea of using my profile tool as a guide from the opposite arch and I realised where I was going wrong.
- Attachments
-
- 02 Wheel arch profile from good side.jpg (176.75 KiB) Viewed 958 times
-
- 01 Wheel arch, old and new.jpg (156.69 KiB) Viewed 958 times
No-one will believe you...
Eventually it all sort of came together and there it is, actually pretty damn close
- Attachments
-
- 06 Wheel arch fitted.jpg (169.64 KiB) Viewed 952 times
-
- 05 Wheel arch fitted.jpg (172.43 KiB) Viewed 952 times
-
- 04 Wheel arch fitted.jpg (177.13 KiB) Viewed 952 times
-
- 03 Wheel arch tacked.jpg (199.4 KiB) Viewed 952 times
No-one will believe you...