Nick Eagle 68 Roadrunner
Moderator: Moderators
-
Anonymous
Nick Eagle 68 Roadrunner
all the emblems and roadrunner decal fitted to the doors,dropped the rear end to standard hieght.
- Attachments
-
- 011.JPG (153.54 KiB) Viewed 2229 times
-
- 013.JPG (164.16 KiB) Viewed 2229 times
-
- 016.JPG (89.62 KiB) Viewed 2229 times
-
Jon Connolly
- Posts: 3116
- Joined: Fri Jan 26, 07 8:53 pm
- Location: Asleep on the tarmac ... I`m tired and emotional
Looks really cool that Nick, quickest resto on here I can remember
Well done

Well done
9.844 @ 134.04 ... Smallblock Valiant + NOS
10.169 @ 130.17 ... Smallblock Dodge Ram pick up truck - motor only.
http://www.youtube.com/watch?v=RvwC1fd0 ... 8Z96U8t0LQ
10.169 @ 130.17 ... Smallblock Dodge Ram pick up truck - motor only.
http://www.youtube.com/watch?v=RvwC1fd0 ... 8Z96U8t0LQ
-
Anonymous
Nick Eagle 68 Roadrunner
cleaned up under the bonnet and repainted k member where it was over-sprayed.steering i have converted to power found out that the column is too short.the new box i fitted is power it must have been a manual before thats why the column is shorter.
- Attachments
-
- 020.JPG (105.29 KiB) Viewed 2220 times
-
- 021.JPG (102.98 KiB) Viewed 2220 times
Last edited by Anonymous on Tue Sep 20, 11 4:55 am, edited 6 times in total.
-
Anonymous
Nick Eagle 68 Roadrunner
rear brakes are in with new brake pipes i have assembled with the old shoes for now want to be sure all the parts are correct will order new lining's and cylinders later, front brakes the same. all new suspension and steering joints. i have sprayed the underside and inner wings with body Schultz.new shockers all round.
- Attachments
-
- 023.JPG (94.13 KiB) Viewed 2218 times
-
Anonymous
Nick Eagle 68 Roadrunner
Thanks jon and rick for the comment's I'm really starting to see results. seats should be here tomorrow, i will make frames for them,then i can fit the carpets. i will also make the rest of the brake pipes up and see if i can get a pedal.
- Attachments
-
- beaf_1.jpg (16.4 KiB) Viewed 2214 times
-
68Roadrunner
- Posts: 842
- Joined: Fri Nov 11, 05 9:39 pm
- Location: Halifax, west yorks
-
Anonymous
Nick Eagle 68 Roadrunner
took all day to make and plumb the brake pipes. fitted a proportioning valve to the rears. i had one and if i fit discs it will save me redoing the pipes later. good news is the brake bleed well and i have a solid pedal.seats came but i ran out of time to make frames.
- Attachments
-
- 001.JPG (58.69 KiB) Viewed 2130 times
-
Cannonball

- Posts: 17242
- Joined: Sun Apr 18, 04 11:26 pm
- Location: crewe, cheshire
- Contact:
hey nick i am pretty sure that b post will just be a painted finish satin black,
i may be wrong can anyone beg to differ ????????????????
i may be wrong can anyone beg to differ ????????????????
www.dwatts80.fsnet.co.uk
WATTS RACING TRANSMISSIONS, CLOBBER THE COMPETITION ITS CLOBBERIN TIME
OFTEN OUTNUMBERED NEVER OUTGUNNED,
HEY WHATS THE TOP END ON THAT SUPERSPORTS. UNLIMITED,
I HAVE A NVQW
LIFE GOES PRETTY FAST, IF YOU DONT LOOK ROUND A WHILE YOU MAY JUST MISS IT,
THE PASS IS THE JUICE,
LOVED BY FEW,
HATED BY MANY
RESPECTED BY ALL
-
68Roadrunner
- Posts: 842
- Joined: Fri Nov 11, 05 9:39 pm
- Location: Halifax, west yorks
b post
i thought the outside colour should be body colour , unless your vehicle came with the decor package and as such would have brushed stainless cappings.
-
Anonymous
Nick Eagle 68 Roadrunner
hi 68 roadrunner (richard?) we are talking about the inside of the post should it have a trim panel. i have posted a question on the restoration page with pictures, your help would be gratefully received thanks.
http://www.moparuk.com/forums/viewtopic.php?t=33362
http://www.moparuk.com/forums/viewtopic.php?t=33362
-
Anonymous
Nick Eagle 68 Roadrunner
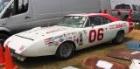
think your right duncan found this poor picture but i watched a video of a car for sale it looks like there are two bang on edge trims plastic strips like around the lower section of the door opening to the rear trim card. thanks again duncan.
- Attachments
-
- !!gdhMZQ!mE~$(KGrHqJ,!hoE)7)lRZvYBMhvU8JYtg~~_4.jpg (26.18 KiB) Viewed 2032 times
-
68Roadrunner
- Posts: 842
- Joined: Fri Nov 11, 05 9:39 pm
- Location: Halifax, west yorks
trims
nick looked on my car and there are 2 edge trims like you thought , but instead of the cross section being flat like the one next to the quarter panel interior trim , they, should be a L section hope this helps richard
-
Anonymous
Nick Eagle 68 Roadrunner
. thanks i will have to use the wind-lace i have got from a austin mini supplier for the front edge, thanks again guys for great help with my kit car.!!
Last edited by Anonymous on Tue Sep 20, 11 4:56 am, edited 1 time in total.