Simon's 68 Charger 'Charlene'

A place to show off your Pride and Joy

Moderator: Moderators

User avatar
Gas for GOSH
Posts: 1081
Joined: Fri Sep 16, 05 9:50 pm
Location: Cornwall, close to a pasty...

Post by Gas for GOSH »

Thanks for the comments and questions guys - I'll try to fit in answers as i go. OK so it's now Autumn 2005 and I'm starting to get to know my Charger. If you look at the Victoria Inn picture (with Missouri from the board and me) you'll see she is missing c-piece eye brow trim round the lights and the metal under the number plate isn't straight. So I start to think what I want to turn Charlene into and I find this picture of a lighter gold Charger I really like.

So with this as my aim I start to think about what I want to do and also what I can do whilst keeping her running - I thought it was so important to enjoy driving her and spread the jobs out. So I tidied up the rusted welds in the trunk lid and sprayed it satin black for the time being until I could sort out the rear end repair.

An immediate basic was also to install an offside wing mirror. I also took both door cards out to check for any evidence of exotic arachnids (none found), check what the metal was like (very good) and fix the driver's door electric window motor (You'll see why that was essential later :) .

I also bunged on a couple of sail panel Charger scripts - she looked kinda bare without them! But although I love that high up stance the air shocks provided i was starting to understand what Alex Doig and others on the board were saying. They were put on to keep the rear quarters off the tyres - if they failed whilst I was doing 70 and the quarters came down on the rubber then :help: so i made a mental note to look into my options here. Also, I know cornering this car is not going to be as easy as a modern car but the air shocks certainly made it more unpleasant than it needed to be. More of that later though. Enough waffle, more pics:
"Now some guys they just give up living - start dieing little by little, piece by piece. Some guys come home from work and wash up, then go racing in the streets...." Bruce Springsteen
User avatar
Gas for GOSH
Posts: 1081
Joined: Fri Sep 16, 05 9:50 pm
Location: Cornwall, close to a pasty...

Post by Gas for GOSH »

In Autumn 2005 I made a list of jobs and missing things. Here's some extracts:

find rear c-pieces
sort out cracked dash pad
find missing driver's side kickplate
find missing drip rail trim by driver's quarterlight
find missing rear defog switch and bezel
find missing external rear window bottom corner connectors (I had the rest of the window trim)

Hmm as I went down the list I thought the rocking horse was going to have to take a laxative if I was gonna find this stuff!
"Now some guys they just give up living - start dieing little by little, piece by piece. Some guys come home from work and wash up, then go racing in the streets...." Bruce Springsteen
User avatar
Gas for GOSH
Posts: 1081
Joined: Fri Sep 16, 05 9:50 pm
Location: Cornwall, close to a pasty...

Post by Gas for GOSH »

Last bit for tonight: Phil440 - It is the original bonnet. The 'orrible scoop had been cut through so Dave Madders had this patched and sorted very well for me before I picked her up.

Whilst making my jobs list the immediate conclusion I reached was how happy I was with the refinished black and white interior. Whilst not a 68 interior from the look of the stitching/ribbing I loved it - it looks like it's been in there a few years so the just worn in look suited me.

As for the original paint bruvmopar the VIN showed she was originally painted FF1 light green and papers found in the car showed she had been changed from this to a deep GM gold around 1990. I loved the gold, especially in sunlight, and the black painted roof set off her lines well as it matched where the original vinyl roof would have been. I also liked the slightly menacing look the black roof and bonnet leant to her size. But having a light green dash pad and interior meant there were too many colours: gold, black, white and green. So the last of the original green had to go. I actually found this decision hard - because it meant taking away the last of the original colour AND I actually was in awe of that cracked dash: it's like oak aged wine or cheese!

Anyhow I removed the totally cracked original dash pad, planed down the foam and installed a new black dash cap replacement. The electric plane took off the hard green surface but do wear eye protection if you do this - it spins shards of sharp stuff straight at you. I also wore a reasonable face mask - I don't know what properties are in the fine dust I got from planing 40 year old cell foam but I thought better safe than sorry. Ok I could have used a craft knife but it would have taken longer and i wanted the foam to retain the contours to fit the dash pad well. If I just sliced off chunks then if i bashed the new dash pad and there was nothing behind it I reckoned it would split and I'd be somewhat cheesed. So even though you cannot see the reshaped foam the dash pad fits quite snug. It also took three goes at planing before i heard the satisfying click when the pad clipped into place and I knew i could secure it. Another learning curve - what should I use that would bond plastic to foam and not dissolve the foam or melt in the heat through the windscreen? As the dash pad was black I sprayed the green metal between it and the windscreen black and bought some black adhesive marine sealant. Three years on it's still stuck down.

I removed and resprayed black the ribbed plastic fascia. I degreased and sprayed the plastic on the glovebox and other dash surround. This was a three stage process to get the paint to bond well. I used a two stage plasticiser, I think called Plastex 1 and 2, before spraying with satin black. Three years on it's all still there - pictures 22 and 23 are virtually 3 years apart. To match the black and white look of the seats I rubbed down and sprayed the air vents and ashtray white enamel. Hence I know it won't win prizes for being totally original but I think these small customisations worked out well. Whilst doing this interior facelift I took out the console lid and autosoled every little groove.

Am I still married someone asked - yeah but if you spend an hour at the end of the day autosoling 40 years of crap out of a ridge you'd best wash your hands before going to bed! 'nuff said..
"Now some guys they just give up living - start dieing little by little, piece by piece. Some guys come home from work and wash up, then go racing in the streets...." Bruce Springsteen
User avatar
Gas for GOSH
Posts: 1081
Joined: Fri Sep 16, 05 9:50 pm
Location: Cornwall, close to a pasty...

Post by Gas for GOSH »

Spring 2006. In order to start gearing up for the rear end sort out I needed to know whether the gold paint could be matched. Apollo Industries in St Mawgan had a person with a spectrometer that came down to them every so often but to provide a proper analysis they needed a piece of the paint a few inches square. I figured the easiest part to remove was the boot, so the boot lid went missing for a few days whilst the spectrometer identified the GM paint.

Also thinking of the rear end I knew from the MMA forum that Neil Willett at USA Imports was, at the time, bringing over some fabulous bumpers that were original cores which had been repressed and re-chromed. I sent him pictures of mine to see if it would be a good enough core to use but in the end decided the crease in the left side may not come out 100% so I placed an order for a rear bumper and guards.

The next job was to put in the rear window trim I had - all bar the bottom corner connectors. The whole of the surround had been filled with rock solid caulk of some description. I found a picture on this forum of the location of the mounting holes and dug out all the caulk, apart from the bottom corners, until I could reveal all the holes. I decided to leave the rear window in which meant that mounting all the new clips for the trim was a bit tricky: I bet this was done with the glass out at the factory(?).

In all it took two days until I had the trim mounted securely. All I could do then was put the request for corner connectors on the board and keep trying places in the States. Still it was another step in the right direction.
"Now some guys they just give up living - start dieing little by little, piece by piece. Some guys come home from work and wash up, then go racing in the streets...." Bruce Springsteen
User avatar
Gas for GOSH
Posts: 1081
Joined: Fri Sep 16, 05 9:50 pm
Location: Cornwall, close to a pasty...

Post by Gas for GOSH »

May 2006: Having previously sprayed the underside I pulled out the seats and carpets to expose the floorplans and wiring runs. The driver’s side was pretty solid but the passenger footwell looked like a burnt brownie and I could see a couple of pinpricks of light. The Charger had left the factory with air conditioning and a heater but the pipes for both of these features had been removed from the engine bay, leading me to suspect maybe the heater matrix had failed leading to dripping of water into the footwell. Time for a trip to see brother in law Dan, foreman of local truck haulage firm Sid Knowles, now sadly ceased trading. Dan’s welded more things than I’ve had hot pasties so I kept watch underneath whilst he expertly welded a patch on top of the footwell. The drainage hole is thus in the same position.

I hammerited the floorplans, the wiring runs and rubbed down and re painted black the bottom of the seats before renewing the rubber mounts and putting it all back. Carpet was still good enough for me. I’ve since checked the car after it has been rained on and, perhaps amazingly for a Charger, I can find no water getting past the windscreen seal so I think the heater matrix hunch was right as the footwell has stayed dry ever since.
"Now some guys they just give up living - start dieing little by little, piece by piece. Some guys come home from work and wash up, then go racing in the streets...." Bruce Springsteen
Anonymous

Post by Anonymous »

It's great to see that you're doing most of it yourself - the car looks ace

J 8-)
User avatar
Gas for GOSH
Posts: 1081
Joined: Fri Sep 16, 05 9:50 pm
Location: Cornwall, close to a pasty...

Post by Gas for GOSH »

June 2006: new brake hoses and pitman arm for MOT, the latter needing heat and pullers at the local garage to sort out for me.

Planning for the Nats that year received a boost. Having been up in the wife's MR2 and my Discovery in previous years I had arranged with Ivan (Missouri) to go in convoy: me in the Charger, him in the Hurst. And some of the missing pieces were coming together too. Neil at USA Imports found me some decent c-pieces for the rear lights so that job was sorted and the infill section between the lights returned to black (when I took the Charger script off the rear there was a black shadow that kinda gave the game away).

Also had success with the kick plate and the two pieces of drip rail trim. In fact sourcing all these missing bits has been one of the most enjoyable aspects of getting into American car ownership. The guy in Georgia who sent me these was a fantastic character. He told me he been in the scrapyard business for 15 years and seen only one second generation Dodge Charger come through his gates in all that time – people were restoring everything no matter how damaged. Nevertheless he had the A section drip rail by the driver’s door and the kick plate – the problem was how to pay for them as did not take credit cards. In a slow Southern drawl he told me “Well I got this kid comin’ in next week, gonna set me up with a computer and somethin’ called Paaay – Paaaaal. I’ll call you back then, sir.” After two weeks with no call I rang back in case he’d lost my number. “You know what”, he told me, ”I chucked that kid right outta my yard – this damn new fangled stuff ain’t the future. Heck, you sound like I trustworthy guy, I’m just gonna put this stuff in the post to you and you send me some dollars back.” And that’s how it worked – old school style!

So I was making progress with the car, she had a new MOT, the Nats were here, the convoy was arranged. All systems go. At 4am on the Friday morning I packed the tent, the beer, my son Josh and a few spares and spanners in Charlene and headed off into the pre-sunrise glow. Apart from annoying a few neighbours before the dawn chorus what could go wrong............
"Now some guys they just give up living - start dieing little by little, piece by piece. Some guys come home from work and wash up, then go racing in the streets...." Bruce Springsteen
User avatar
Gas for GOSH
Posts: 1081
Joined: Fri Sep 16, 05 9:50 pm
Location: Cornwall, close to a pasty...

Post by Gas for GOSH »

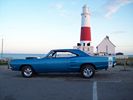
By the way Jonny - Patina - love the look of your Charger: there was a beat up blue Plymouth I think a couple of years ago, maybe the 2006 Nats, with a great set up that gave the French Connection's green Challenger a heck of run. It is fantastic when something so raw looking is set up so well. That's beyond me so best of luck with it.

Anyhow, back to 2006 Nats. Muse released 'Black Holes and Revelations' and I was about to have a Supermassive Black Hole in my bank account.

With one mile left of the 300 miles to the Pod my after market oil pressure gauge dropped to zero. Although there was no bang I immediately switched her off and rolled to a stop, expecting the worst. The only plus point I could see was that I was one mile away from the best brains, hands and Mopar knowledge this side of the states. 8-) After ensuring there was no obvious spillage I turned her over and limped to the track. I did receive some advice along the lines of "It's only a quarter of a mile - you wont use up much oil doing that, go on get it down the track". If that was the devil whispering in one ear, the other ear had the wise old owl we were camped next to (aka Dave Robson) just quietly going "Hmm I think there's more to it than that".

I decided there was no way I would risk her on the strip so Josh and I just enjoyed another great weekend’s viewing and my quarter mile cherry remained intact. The only further disappointment came when I offered Josh his choice of a scale model and he picked, yes, a Ford Mustang – groan! Having not been able to find any rear corner connectors I bought some top rear window trim off Duncan Watts Holy Grail of spares stand to refashion later.

Charlene ran back to Cornwall at a steady 50mph but the oil pressure which had been a very solid 40 before was erratic. When the needle dropped off the scale again I took her back to David Madders for a full investigation and some agreed extras. Worn cam bearings were the probable cause of my oil pressure problems, but as mentioned before I also did not like the car resting on the air shocks. I appreciated the look of the stance but not the ride that came with it. I had looked into Caltracs monoleafs with plenty of time and patient advice given me by Neil at USA Imports :read2: Whilst this might preserve the stance I made the decision in the end to stick with originality for this car but beef it up a bit. So as Dave Madders was tasked with freshening up the engine I thought it would be rude not to ask for a set of Hemi leaf springs and new shocks as well! So my shopping list ended up like this:
Rebore to + .030”
KB162 Aluminum Pistons @ .030” over
Piston Rings @ .030” over
Crankshaft Grind to .010/.020 under
Crankshaft Main Journal Bearings @ .010 under
Crankshaft Rod (Bigend) Bearings @ .020 under
Balance Reciprocating Components
Camshaft Bearings
Mopar Performance 484 Muscle Car Cam & Lifters
High Volume Oil Pump
Oil Pump Strainer/Pickup
Core Plug Set
Full Engine Gasket Set inc Headgaskets
KYB Shocks and Hemi Leaf Springs
"Now some guys they just give up living - start dieing little by little, piece by piece. Some guys come home from work and wash up, then go racing in the streets...." Bruce Springsteen
User avatar
BJ Mac
Posts: 595
Joined: Fri May 04, 07 4:29 pm
Location: West Lothian ,Scotland

Post by BJ Mac »

Great post, keep it coming :thumbright:
User avatar
Gas for GOSH
Posts: 1081
Joined: Fri Sep 16, 05 9:50 pm
Location: Cornwall, close to a pasty...

Post by Gas for GOSH »

Some alternative dictionary definitions:

BRACING = Jumping into the Atlantic on Christmas Day

INVIGORATING = Mistakenly rubbing Deep Heat into a wound instead of anti-septic (when you're tired and hurting in a dark tent these things happen)

INSPIRING = Running in a refreshed engine in a Charger with it's restored ride, just cruising from Manchester to Cornwall enjoying the more sonorous engine note without any deadlines at all.

Yessir, I know you will find more technical know how on Dave's Challenger thread or any of the beautiful JPC resorations, and sure I do need to learn more about what makes things tick, but the above work that Dave Madders did is way too steep a learning curve for me just now. And, if the truth be told, it did not leave a Supermassive Black Hole in the account. And more importantly she has run beautifully since. And there was a bonus - cannot recall who but someone had some proper corner connectors for sale and Dave had reserved me a pair. :thumbright:

So now it's early 2007 - time to take the rear window trim out, remove the remaining caulk and refit including the corners. It took a bit of time and fettling but they are in and for the first time I have a Charger with all her external brightware.

June 2007 - it's now time to install that wonderful new bumper from Neil Willett at USA Imports. But before that can be done the rear end needs attention. When I take the old bumper off I see that it had been getting a lot of attention - from bees! I knew from papers in the car she had been on the road up to 2003 so in the 2 years before I got her there must have been a real hive of activity (sorry :oops: ). There was one honeycomb running virtually the length of the rear bumper - the photo is of the largest single bit I pulled out. What did not get attention was the bumper inset when the gold was first done by the look of it.

So I got the guy who was going to do the spraying to come have a look and agree what I could do before handing it over, which was plenty of basic rubbing down and re-drilling of the bumper mounts to get a decent line up with the new bumper. The straightening of the rear valence I left to Tim. When I got her back she looked pretty nice.
"Now some guys they just give up living - start dieing little by little, piece by piece. Some guys come home from work and wash up, then go racing in the streets...." Bruce Springsteen
User avatar
Gas for GOSH
Posts: 1081
Joined: Fri Sep 16, 05 9:50 pm
Location: Cornwall, close to a pasty...

Post by Gas for GOSH »

I did post the next update but then the computer had a wobbly so apologies if this ends up a repeated post.

Now for the bumper. Neil's high quality control standards had resulted in the first bumper due for me being rejected, but I would rather wait than settle for a lesser product. So when I did go up to Leicester to collect the bumper it had been like seeing the glinting jewel in Aladin's cave. It had been secured until the body was ready so now I polished it up, brushed the rear with a couple of coats of waxoyl and asked a neighbour to help position it.

Then just another bit of tidying: rubbing down the inner door metal, including the bottoms of the doors, and hammeriting.

Next step: R/T tips and stripe and losing a cherry. Aiming to finish the write up before the nats if poss. G'night y'all
"Now some guys they just give up living - start dieing little by little, piece by piece. Some guys come home from work and wash up, then go racing in the streets...." Bruce Springsteen
User avatar
Gas for GOSH
Posts: 1081
Joined: Fri Sep 16, 05 9:50 pm
Location: Cornwall, close to a pasty...

Post by Gas for GOSH »

Summer 2007: Exhausting work. First the quick and easy bit: install heat shield on exhaust to protect join in fuel pipe. Then the harder job of getting the R/T tips on. As this Californian car came with turn down tips hidden up under the rear valence I guessed it was unlikely the bolts for the hangers had been moved since the car was built. Nevertheless with a little grease multiplied by elbow grease they loosened nicely: could you say the same for a 40 year English car kept over here?

After the welds on the turndown tips were angle grinded they slid off and I then found that one side was slightly different to the other. The inside of the new tips was 2 1/4 inches which was a tad loose one side and a touch tight on the other. So one side got the hammer and wedge treatment on the hanger and the inside of the tip was ground down a bit on the other side. A top tips tip - if like me you are installing projecting tips on a car where they were hidden and you have a raked drive like me make damn sure the tips will clear the ground first! I gaffer taped the cardboard boxes the tips came in to the valence first and tried it before cutting anything off. I've got an inch to spare on one side.

My username is wreckova68 because when I first got Charlene a friend said "Bet you will wreck that in a month". So it was a bit of a motivator for me - every time I improve the vehicle I think of that comment and plan the next thing.

In September the next thing was to go down a quarter mile for the first time and thanks to a tip off from Mad Machs Mike I got into the RAF Portreath sprint on a nearby airfield. With no suregrip and only 2.76 in the rear she was never going to launch like a rocket so for me the most pleasing aspect comes after the 1/4 mile when she gets to run well over a 100mph before stopping to avoid the drop off the cliifs.
"Now some guys they just give up living - start dieing little by little, piece by piece. Some guys come home from work and wash up, then go racing in the streets...." Bruce Springsteen
User avatar
bruvmopar
Posts: 2377
Joined: Thu Jul 12, 07 2:55 pm
Location: Poole Dorset

Post by bruvmopar »

Super Posts, Simon, :salute: Anymore Please. :atthemovies: :thumbright:
1969 Dodge Coronet SuperBee.
1968 Dodge Charger.
1962 Imperial LeBaron 4-dr HT.
1969 Mercury Marquis 2-dr HT.
1955 Cadillac series 62 2-dr HT Cpe.
1956 Chevrolet Belair 4-dr Sedan.
1977 Lincoln Continental Mark V.
1994 Ford Mustang GT V8
2003 Audi A4 TDI Estate
2005 Ford Transit
User avatar
Gas for GOSH
Posts: 1081
Joined: Fri Sep 16, 05 9:50 pm
Location: Cornwall, close to a pasty...

Post by Gas for GOSH »

November 2007: got some vinyl, sprayed it to match the car and filled in the hood depressions.

Now early 2008: applying the 68 stripe kit. Having read Project Charger I followed everything it says in there about applying the stripe with a couple of exceptions. Firstly I sprayed the Easy-On on both the car and the stripe. Otherwise I found that having cleaned the car with paint cleaner the surface was so pure the stripe would start to stick down unless there was a reasonable amount of fluid. The book says spray it on the stripe only - I would rather have more to squeegee out and have plenty of manoueverability. Also if you are putting the stripe on in your garage, even if you clean it up as best as possible, if you expose the entire adhesive side of the stripe before putting it on there is a risk that some fluff or dust or other detritis is going to stick on it before you can spray it all. So I exposed a section of stripe then sprayed , then revealed etc.

I had read some threads on here about not over-raking the stripe and how it should be in line with the bumper recess, so I followed that. After squeegeeing I left the backing tape on overnight with a dehumidifer near the car. When removing the backing tape certainly roll the tape slowly. I decided to start at the bottom and roll up - you can't have a roll up in the pub, but you can in yer garage.

Having since read the comments on here in recent posts about the beautiful works at JPC a painted stripe may well last longer and be more resistent, but I'm happy with the vinyl one anyway.
"Now some guys they just give up living - start dieing little by little, piece by piece. Some guys come home from work and wash up, then go racing in the streets...." Bruce Springsteen
User avatar
Gas for GOSH
Posts: 1081
Joined: Fri Sep 16, 05 9:50 pm
Location: Cornwall, close to a pasty...

Post by Gas for GOSH »

Okay, Okay so the purists amongst you will have noted the R/T emblem above but if you look back at the gold Charger I was aiming to emulate then the emblem just completed the look for the picture. As a 383 it is obviously not an R/T and i would never try to suggest it was.

Also from the RAF quarter mile pic you can see she is now running on Magnums, not just because they were on the car I was copying but the 10inch wide smoothies would not fit once the air shocks were taken off. Even with hemi springs I reckon I have lost about 2-3 inches off the rear ride height, which nearly caught me out at MOT time as the headlights' angle had changed. Soon sorted. I'm keeping the smoothies in case I get another project in the future.

Spring 2008: I got a Year One trunk mat shipped to Neil Willett's FBO contact as shipping it through Neil more than halved the cost Year One quoted as an oversize item delivery to the UK.

Then I decided it was time for a change up front. The bonnet was removed and given to Tim, my sprayer in Tregony, to match the car. The black windscreen wipers against the silver arms had also bugged me so i roughened them up and applied aluminium paint.

June 2008: MOT straight through- ye ha! But I had noticed a couple of small bubbles on the roof - probably where a previous owner had left the original vinyl on too long. As this was the roof area I decided to have a go myself on the basis that if it did not look good I could get it re-vinyled. So I bare metalled it which took FOREVER with a sander and a dremel to work into the couple of spots I was after. When I was sure the affected area was totally bare I applied a green gunge acid type gel, wire brushing it into the areas I had noted, and left it 2-3 hours. When I wiped it off it was browish in places so I re-applied and did it again. This time the gel stayed greenish so when I cleaned it off I immediately applied the paint. I used aerosol as I was actually interested to see if the finish would resemble the dappered look of a vinyl roof. I figured if you have a glossy paint roof, glossy paint and shiny bumpers it's all so, well, glossy really. If you look at Two Lanes Charger for sale, or the 318 Mr Madders has in black primer, and imagine those with immaculate chrome and stainless the unpolished paint would really highlight the metal. So, I am going to live with my roof for a year to make sure nothing comes back, then if I like it as is it can stay, if not it can be vinyled.

This'll be the last pre-Nats post so I will sign off by saying a big thanks to everyone who has helped me get this far, either in terms of suppliers or the great advice you get from people on this board. Most recently a big thank you :Absynth: to Kev Carrington for tracking down the rear defog switch and bezel, which were the only items missing from the list at the start of this thread.
"Now some guys they just give up living - start dieing little by little, piece by piece. Some guys come home from work and wash up, then go racing in the streets...." Bruce Springsteen
Post Reply