db's 66 Belvedere ***FOR SALE***

Use this forum for all your builds in progress.

Moderator: Moderators

User avatar
db
Posts: 8368
Joined: Sun Apr 18, 04 10:50 pm
Location: Paul McQueen , N Wales

Post by db »

Well after a couple of hours with my angle grinder then the strip-wheel, then 3-4 hours With my Dremel, it's De-Ox time.
I worked it in with a toothbrush then laid loads more on with a paintbrush.
I've laid on several layers of clingfilm to stop it drying out and have a heater to keep it working.
I'll leave it now til tomorrow and see how it's done :thumbright:
Attachments
Rear panel in Deox.jpg
Rear panel in Deox.jpg (196.52 KiB) Viewed 1102 times
No-one will believe you...
User avatar
db
Posts: 8368
Joined: Sun Apr 18, 04 10:50 pm
Location: Paul McQueen , N Wales

Post by db »

The pain in my eyes subsided a bit this afternoon (from having 13 bits of metal pulled out of my eyes by a nice nurse this morning...) so I though I'd make the most of my day off sick.
The Deox had been on 24hrs and even with 3 layers of clingfilm had dried out quite a bit. The effect was still dramatic!
The gunge under the climgfilm came off with a lot of hot soapy water and a lot of scrubbing to reveal at least 3/4 of the rust had dissolved away.
VERY satisfying :D
You can see in the close-up that the deeper pitting is still rusty. I've painted a second coat on now and clingfilmed it. We'll see how that's done tomorrow...
Attachments
Rear panel 1st Deox. Close up.jpg
Rear panel 1st Deox. Close up.jpg (167.2 KiB) Viewed 1329 times
Rear panel 1st Deox. washed down.jpg
Rear panel 1st Deox. washed down.jpg (197.21 KiB) Viewed 1329 times
Rear panel 1st Deox. clingfilm off.jpg
Rear panel 1st Deox. clingfilm off.jpg (218.63 KiB) Viewed 1329 times
No-one will believe you...
User avatar
db
Posts: 8368
Joined: Sun Apr 18, 04 10:50 pm
Location: Paul McQueen , N Wales

Post by db »

I'm having a short break from de-rusting while I buy in an air die grinder- my Dremmel has packed in again!

So it's ENGINE REPAIR TIME :thumbright:

Chris at WASP is ringing me next week with price/ availability of the valvetrain stuff I need. I've just loaned a spring compressor from Ade J and I've got 'The Step By Step Guide To Blueprinting' by Rick Voegelin from my mate Dunk (not Dunc) who's built tons of race motors and currently maintains about £10m-worth of racecars for his ridiculously rich boss, so I have a good helper there!
I'll need a spring pressure tester please if anyone have one I could borrow? and I'll go through all the clearances etc.
No-one will believe you...
User avatar
db
Posts: 8368
Joined: Sun Apr 18, 04 10:50 pm
Location: Paul McQueen , N Wales

Post by db »

Not great progress as the valve spring compressor didn't fit :(

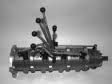
I did get my two new rockers (thanks Blue) swapped for the two damaged ones. This was a struggle as the shafts are slightly ovalled where some of the clamps fit due to over-tightening (most likely by me).
I had to heat the rockers to get them off! I corrected the end of one shaft in the vice, not ideal practice I know but it was only a few thou and I was very gentle ;) 
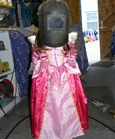
The new rocker slid on so easily Scarlett did it!
We took the studs out aswell. Some were loose, some needed the two-nuts trick which Scarlett was well impressed with :D

I'm on the lookout for a longer reach compressor now, as well as a pressure measuring device...
Attachments
Scarlett unscrewing rocker stud.jpg
Scarlett unscrewing rocker stud.jpg (170.04 KiB) Viewed 1275 times
Scarlett fitting rocker.jpg
Scarlett fitting rocker.jpg (142.03 KiB) Viewed 1275 times
No-one will believe you...
User avatar
db
Posts: 8368
Joined: Sun Apr 18, 04 10:50 pm
Location: Paul McQueen , N Wales

Post by db »

Rear panel rust free at last!
This killed my Dremel twice and inspired me to buy an air die grinder, as well as several soakings in rust killer.

And... I now have a REV LIMITER! :thumbright: Thanks to Dave Billadeau for my new Mallory ignition
Attachments
Mallory ignition.jpg
Mallory ignition.jpg (182.78 KiB) Viewed 1240 times
Rear panel rust free 02.jpg
Rear panel rust free 02.jpg (194.57 KiB) Viewed 1240 times
No-one will believe you...
User avatar
autofetish
Posts: 5599
Joined: Sat May 21, 11 6:43 am

Post by autofetish »

Wow wow wow looking great
User avatar
db
Posts: 8368
Joined: Sun Apr 18, 04 10:50 pm
Location: Paul McQueen , N Wales

Post by db »

AAARRRGGGHHHHHH!!!! This is doing my head in now :evil:


The tool I borrowed from Ade J I got to fit eventually but had to give up before I damaged it- the valve didn't budge, it was bending the tool!
I borrowed two of the lever type. One Sykes-Pickavant, one German made so not cheap crap.
I had some success, I got the inlets out with the S-P one, but with a smack of a mallet to loose the tapers and enough strain to bend the tool frame and nearly put my shoulder out of joint I still couldn't shift the exhaust valves more than about 1mm! :?

ANY IDEAS??
Attachments
Valve removing.jpg
Valve removing.jpg (235.74 KiB) Viewed 1203 times
No-one will believe you...
User avatar
Pete
Posts: 22108
Joined: Sun Apr 18, 04 10:49 pm
Location: MMA Chairman

Post by Pete »

You try getting the valves out of a Hemi.

We had to build a purpose-made tool that was strong enough to compress the springs whilst being able to straddle the wide head........
Pete Wiseman; Cambridge.

Mopar by the grace of God
User avatar
autofetish
Posts: 5599
Joined: Sat May 21, 11 6:43 am

Post by autofetish »

welded the tool end onto a large shach clamp and then put a t bar on Handel and wind it down slow have loads of clamps if you want to play with.

Welding capri up so in all weekend
User avatar
Pete
Posts: 22108
Joined: Sun Apr 18, 04 10:49 pm
Location: MMA Chairman

Post by Pete »

That's what I did, Fettish!! :thumbright: :thumbright:
Pete Wiseman; Cambridge.

Mopar by the grace of God
User avatar
autofetish
Posts: 5599
Joined: Sat May 21, 11 6:43 am

Post by autofetish »

Or pin the head to a bench weld a co2 sensor removal tool or cut a socket up weld it to a large pole . Hinge pole off wall/bench and push down


Or don't you have a milling Machine :idea1: :idea1:


Or head on floor in a door way large pole and bottle jack :idea1:
Last edited by autofetish on Sat Nov 16, 13 6:24 pm, edited 1 time in total.
User avatar
db
Posts: 8368
Joined: Sun Apr 18, 04 10:50 pm
Location: Paul McQueen , N Wales

Post by db »

Thanks boys, I'll look into that tomorrow :thumbright:
No-one will believe you...
User avatar
ANTON
Posts: 2046
Joined: Tue Nov 04, 08 12:33 pm
Location: Sutton,Surrey
Contact:

Post by ANTON »

Stick them in the hydraulic press using the valve spring compressor part so you can remove the collets. I alway give them a very had smack with a large drift and club hammer to free the collets.
www.apdautomotive.co.uk
APD Automotive
Unit B3 Connaught Business Centre
22 Willow Lane
MITCHAM
CR4 4NA
0208 6400729

https://www.facebook.com/#!/apdautomotive.ltd
User avatar
db
Posts: 8368
Joined: Sun Apr 18, 04 10:50 pm
Location: Paul McQueen , N Wales

Post by db »

:thumbright:
No-one will believe you...
User avatar
db
Posts: 8368
Joined: Sun Apr 18, 04 10:50 pm
Location: Paul McQueen , N Wales

Post by db »

Cracked it :D
Hydraulic press to the rescue. So easy I feel like I'm cheating!

While I was at it, I measured closed spring length. I used the press to fully open the valve (0.585"), then opened it further (very gently!) until the spring bottomed out.
I worked out I have 0.1" spring gap at full valve opening :thumbright:
Attachments
Valve removal the easy way.jpg
Valve removal the easy way.jpg (188.46 KiB) Viewed 1118 times
No-one will believe you...
Post Reply