That's the bit I would be worried about.Dave999 wrote:rings were gapped based on 4 inch bore becasue my pistons have had the top edge profiled the top ring is nearer to the Fire than normal it will get a little hotter then normal
its a 3.93 inch bore
some engine progress
Moderator: Moderators

Pulled it out last weekend
got round to taking off head sump and 1 rod n piston out last night
rings look like new
no ring land damage
piston coating slightly worn
top ring is shiny ring, dot faces up
middle ring is dull cast ring taper to inner bore faces down
oil scraper ring is fully expanded correctly butted and non of the ring gaps were aligned with each other
there is cross hatch on the bore...might be too little but still visible
can only assume at this point
1) bore wash
2) too slippy oil or oil standing up on baffle and getting whisked up onto walls in excessive amount
what do you think
i have missed something
my garage is a home to mr cockup on a regular basis but i can't see whats missing here
top ring looks untouched
second ring has slight ware (shiny) but uneven...more towrds ring gap than oposite side
other things to note
light circle scored into tha face of one lifter
slight scuffing to big end bearings near the joins i guess they never get near the journal at the split
head looks good
uniformly carbon covered around all vlaves if i had a leak i'd expect it to be a bit scorched with some kind of marking where the hot gasses whistled out.
do i invest in a dingo bollock hone
if i do that do i stick with part worn in rings or go for new
Dave
- Attachments
-
- IMG_0982 (Small).JPG (65.36 KiB) Viewed 1914 times
-
- IMG_0977 (Small).JPG (89.48 KiB) Viewed 1914 times
-
- IMG_0969 (Small).JPG (40.6 KiB) Viewed 1914 times
-
- IMG_0961 (Small).JPG (78.94 KiB) Viewed 1914 times
The Greater Knapweed near the Mugwort by the Buckthorn tree is dying

I guess you put Moly rings in Dave? Hence mentioning a 400 grit hone, 180 is far to course for Moly rings. I would stick a set of total seal cast iron rings in, no need to re-hone, chances are the rough surface has rubbed the moly coating off so you will need new rings anyway.
Petty Roadrunner 416 Stroker 4 Speed
*MMA-609*
"Built to be driven!"
Why me???
*MMA-609*
"Built to be driven!"
Why me???
i'll dig the rest out and see whats what
yeah 180 would be too rough according to the sppedpro/sealed power info
but the top rings once the oil is cleaned off look like they haven't been used...this is odd
if i can avoid taking it all to bits that would be great
dave
yeah 180 would be too rough according to the sppedpro/sealed power info
but the top rings once the oil is cleaned off look like they haven't been used...this is odd
if i can avoid taking it all to bits that would be great
dave
The Greater Knapweed near the Mugwort by the Buckthorn tree is dying
OK
pulled it to bits
honed it
crank in
rings gapped
rings installed
pistons in
head gasket sperated out cleaned and glued back together with a thin coat of hylomar
but 1 thing i did note was the thermostat fitted was 160F
i still have the box, said 185 on the box.....i should have checked it. ebay purchase
so i guess running cold would not have helped matters either, activly making any bore wash scenario worse
The Greater Knapweed near the Mugwort by the Buckthorn tree is dying
OK quick update Engine was pulled down
bores were smooth
bores honed for moly rings 400 grit flex hone
new rings
back togther
new stat
rubber main seal off a poly engine, the rope was working fine but was never happy that i'd done it right
painted it red this time not Wrong US hemi orange but daft aussie hemi orange which is red kind of but not orange
got it in 4 weeks ago
runs great
tried to pull out of garage. noisy clutch
stopped
sighed....swore
pulled box
pulled clutch
clutch has fat bit in middle on both sides
clutch in wrong way tsk tsk More hurry less speed
1 side fatter than the other. no damage done, 1 rivet head higher than the rest. small witness mark on flyhweel bolts
profile to both end of spline. hence confusion
clutch back in
box won't go on
then follows 4 saturdays and 5 or 6 evenings trying to get box back in
its been in and out 5 or so times in the past with old chrysler clutch, never had an issue
clutch off 3 or 4 times to check for burs. nothing obvious
plate goes into box no problem
plate centering tool purchased, my tape wrapped bit of screw driver handle had served me well up to this point.
can't get box in
box guides made from pipe and threaded rod
can't get box in
box offerd up with no throw out bearing
can't get box in
tail shaft on box in gear, twisty twisty
can't get box in
engine turned over a smidge of an inch time and time agian
can't get box in
clutch Z bar undone
Exhaust dismanted
engine drooped further
can't get box in
eventually invested in small files
spent an hour carfully tapering the triangular end of each spline slightly to help drive the input shaft 1 way or the other.
can't get box in
move flywheel a smidge
in like flynn.
no more oil in face
no more box falling off jack
no more crushed hands
no more cut head on split pin of steering balljoints
no more swearing
no more grit down the crack of my ass, in my hair, in my shoes
it got to the point where resting my head on a block of wood on the garage floor was as inviting as an extra puffy pillow
clutch centre is custom job orginal 26 spline holden centre replaced with 23 spline on 1 inch mopar, its made of a much softer material than standard and the splines end like a section of Toblerone a flat triangle. Any pressure to push box home was wedgeing the plate spline onto the taper of the input shaft and not allowing the plate to move round slightly to jiggle into poistion....
prop shaft UJs re built. I lost a cup and rollers while turning it to assit with box installation.
sent spare axle 3.45:1 gears and a True Track/TOR-SEN type centre off to Mr Hauser to be built as all of this time was supposed to be spent on it rather than this merry dilly-dance with the box
Diff centre too fat for pinion so pinion head needs shave.. couldn't have done that myself so all works out good in the end.
also partially rebuilt webers. they were new, i was never that happy with them, now i know why.
throttle plates should be in the middle of the bore i.e when closed they should seal or at least have equal space as in 1 or 2 thousanths of an inch all round. undone, moved, sorted
throttle shafts should not bind when carb is hot and throttle lever is bolted on ...should not need spacing out of dust cap and lever... sorted, end of shaft bore polished, dust caps polished.
1 float although made of spansil (turbo carb floats) should not get fuel-water-logged. had kind of degraded and looked like sponge, was ok when originally installed, Tres odd.
spanish float purchased
float levels reset.
trottle plates set on the throttle stop, so edge of disk covers totally the first progression hole. no light can be seen through it with carb bore illuminated.
all idle air set by plate bypass screws only no opening up throttle plates apart to align edge with smallest lowest progression hole.
With modern DCOE152G everything i thought i knew about webers and dellorto setup was wrong.
The progression holes are lower in the bore and smaller and dictate little or no throttle opening at all hence the need for the idle air flow plate bypass circuit on this type.
Ahhh
progress at last
Dave
bores were smooth
bores honed for moly rings 400 grit flex hone
new rings
back togther
new stat
rubber main seal off a poly engine, the rope was working fine but was never happy that i'd done it right
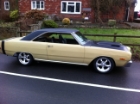
painted it red this time not Wrong US hemi orange but daft aussie hemi orange which is red kind of but not orange
got it in 4 weeks ago
runs great
tried to pull out of garage. noisy clutch
stopped
sighed....swore
pulled box
pulled clutch
clutch has fat bit in middle on both sides
clutch in wrong way tsk tsk More hurry less speed
1 side fatter than the other. no damage done, 1 rivet head higher than the rest. small witness mark on flyhweel bolts
profile to both end of spline. hence confusion
clutch back in
box won't go on
then follows 4 saturdays and 5 or 6 evenings trying to get box back in
its been in and out 5 or so times in the past with old chrysler clutch, never had an issue
clutch off 3 or 4 times to check for burs. nothing obvious
plate goes into box no problem
plate centering tool purchased, my tape wrapped bit of screw driver handle had served me well up to this point.
can't get box in
box guides made from pipe and threaded rod
can't get box in
box offerd up with no throw out bearing
can't get box in
tail shaft on box in gear, twisty twisty
can't get box in
engine turned over a smidge of an inch time and time agian
can't get box in
clutch Z bar undone
Exhaust dismanted
engine drooped further
can't get box in
eventually invested in small files
spent an hour carfully tapering the triangular end of each spline slightly to help drive the input shaft 1 way or the other.
can't get box in
move flywheel a smidge
in like flynn.
no more oil in face
no more box falling off jack
no more crushed hands
no more cut head on split pin of steering balljoints
no more swearing
no more grit down the crack of my ass, in my hair, in my shoes
it got to the point where resting my head on a block of wood on the garage floor was as inviting as an extra puffy pillow
clutch centre is custom job orginal 26 spline holden centre replaced with 23 spline on 1 inch mopar, its made of a much softer material than standard and the splines end like a section of Toblerone a flat triangle. Any pressure to push box home was wedgeing the plate spline onto the taper of the input shaft and not allowing the plate to move round slightly to jiggle into poistion....
prop shaft UJs re built. I lost a cup and rollers while turning it to assit with box installation.
sent spare axle 3.45:1 gears and a True Track/TOR-SEN type centre off to Mr Hauser to be built as all of this time was supposed to be spent on it rather than this merry dilly-dance with the box
Diff centre too fat for pinion so pinion head needs shave.. couldn't have done that myself so all works out good in the end.
also partially rebuilt webers. they were new, i was never that happy with them, now i know why.
throttle plates should be in the middle of the bore i.e when closed they should seal or at least have equal space as in 1 or 2 thousanths of an inch all round. undone, moved, sorted
throttle shafts should not bind when carb is hot and throttle lever is bolted on ...should not need spacing out of dust cap and lever... sorted, end of shaft bore polished, dust caps polished.
1 float although made of spansil (turbo carb floats) should not get fuel-water-logged. had kind of degraded and looked like sponge, was ok when originally installed, Tres odd.
spanish float purchased
float levels reset.
trottle plates set on the throttle stop, so edge of disk covers totally the first progression hole. no light can be seen through it with carb bore illuminated.
all idle air set by plate bypass screws only no opening up throttle plates apart to align edge with smallest lowest progression hole.
With modern DCOE152G everything i thought i knew about webers and dellorto setup was wrong.
The progression holes are lower in the bore and smaller and dictate little or no throttle opening at all hence the need for the idle air flow plate bypass circuit on this type.
Ahhh
progress at last
Dave
Last edited by Dave999 on Thu Mar 26, 15 3:12 pm, edited 2 times in total.
The Greater Knapweed near the Mugwort by the Buckthorn tree is dying
-
MilesnMiles
- Posts: 7309
- Joined: Fri Nov 04, 05 8:40 pm
- Location: Cornwall
yeah
i've had enough
nothing like being flat on your back, arm above your head slowly easing the jack forward over ribbed concrete by turning the jack wheel
only to have the box slip. (and it was tied down)
you are supporting the box now with that hand
your hand is way back above your head
you don't have the physical strength at that angle to Bananarama! back up
if you let it go thats a cast iron box falling 8 -12 inches onto concrete
but you can't turn over becasue your other shoulder is pinned under the pitman arm of the steering box.
help.....
Its then you think.....should have been doing this with a mate....
so you let go and the straps hold it an inch from the floor
then you drag yourself out and find that the waist band of your trousers has collected only the sharpest grit and swarf to feed into your pants as you stand upright.... by this stage hungry cold and broken....
shove the car back in
follwed by mig welder 5 skate boards 4 bikes a go cart 2 rolls of carpet a roof rack and a box full of heavy but useless crap from the swap meet 4 years ago
ahh well try again tomorrow....
i think i'd sell my kidneys for a 4 post lift and a trans jack
Dave
The Greater Knapweed near the Mugwort by the Buckthorn tree is dying
-
Dave-R

- Posts: 24752
- Joined: Sun Apr 18, 04 11:23 pm
- Location: Dave Robson lives in Geordieland
- Contact:
You want to try fitting a 727+GV overdrive in by yourself mate. Had to do that a few times. Two jacks under it. Like tight rope walking while bench pressing a weight too heavy for you.
Glad it is coming together now though. This is the right engine in the right car and it is going to be brilliant to drive.
Keep soldiering on.
Glad it is coming together now though. This is the right engine in the right car and it is going to be brilliant to drive.
Keep soldiering on.
-
MilesnMiles
- Posts: 7309
- Joined: Fri Nov 04, 05 8:40 pm
- Location: Cornwall
We should have 'broken owner' section! Took two of us to drop my new heads in due to the convoluted angles, sheer weight and knackered backs from years of abuse.
I reckon Dunc would have tossed them in from distance whilst quaffing a beer
That scenario of your's Dave999, be careful eh? Don't want to be crushed by heavy metal things; I remember dropping my trans with only a scissor jack and a lot of bits of wood
I reckon Dunc would have tossed them in from distance whilst quaffing a beer
That scenario of your's Dave999, be careful eh? Don't want to be crushed by heavy metal things; I remember dropping my trans with only a scissor jack and a lot of bits of wood
-
Johnny Dart
- Posts: 852
- Joined: Tue Dec 24, 13 12:46 pm
- Location: East Sussex
i think i'd sell my kidneys for a 4 post lift and a trans jack
Dave[/quote]
It sounds like you are making progress Dave, unfortunatly any thing thats not quite standard, has to be fettled/jiggled/sworn at, from time to time
That's the reason I bit the bullet , and bought a 2 post ramp.
It just aint fun laying on the floor
Dave[/quote]
It sounds like you are making progress Dave, unfortunatly any thing thats not quite standard, has to be fettled/jiggled/sworn at, from time to time
That's the reason I bit the bullet , and bought a 2 post ramp.
It just aint fun laying on the floor