That's my problem, when I try searching for the lb setting in getting different numbers.
I'm guessing I can over tighten and crunch the axle tube?
Replacing leaf spring bushes
Moderator: Moderators


rough guide
https://www.autoandtrucksprings.com/pag ... orque.html

follow link for bolt size and torque spec.
I can see where my 70 Ftlb guess came from now, only appropriate for fatter bolts
I did mine to 45....based on my manual small axle small bolts etc
Dave
https://www.autoandtrucksprings.com/pag ... orque.html
follow link for bolt size and torque spec.
I can see where my 70 Ftlb guess came from now, only appropriate for fatter bolts
I did mine to 45....based on my manual small axle small bolts etc
Dave
The Greater Knapweed near the Mugwort by the Buckthorn tree is dying
Tidy!!!latil wrote:http://www.mymopar.com/index.php?pid=109
Pete Wiseman; Cambridge.
Mopar by the grace of God
Mopar by the grace of God
Cool, thanks.
I know it's best to replace the U bolts. Is it ok/normal to re use the front eye bolts and nuts?
Looking at the manual it says to,
Tighten shackles and front eye bolt to 30 ft-lb while its in the air
Tighten U bolts to 40 ft-lb while in the air (that's these finished)
Put car on ground and tighten privet bolts (I'm taking it these are the front eye bolts) to 125 ft-lb. then shackle bolts to 40 ft-lb.
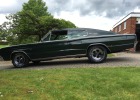
This is for the Coronet and Charger in case anyone else ever needs this. The Charger is just a Coronet underneath.
I know it's best to replace the U bolts. Is it ok/normal to re use the front eye bolts and nuts?
Looking at the manual it says to,
Tighten shackles and front eye bolt to 30 ft-lb while its in the air
Tighten U bolts to 40 ft-lb while in the air (that's these finished)
Put car on ground and tighten privet bolts (I'm taking it these are the front eye bolts) to 125 ft-lb. then shackle bolts to 40 ft-lb.
This is for the Coronet and Charger in case anyone else ever needs this. The Charger is just a Coronet underneath.
Lovely weather today and job done. We used a variety of pullers and g clamps etc to get all the old bits out and only had one really tricky part. We couldnt get the top bolt section of the rear shackle out of the hanger so we ended up just gently heating the top fixed end of the bolt and the heat transferred through and softened up the old rubber bushes. We then just slid it out and replaced everything after cleaning etc.
Took about 2 1/2 hours start to finish.
Thanks for all your help on this men
Cheers Steve and Andy
Took about 2 1/2 hours start to finish.
Thanks for all your help on this men
Cheers Steve and Andy
Bat Girl Stalker Living Petes Dream

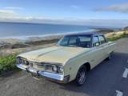
A big thank you to everyone for your advice and help, and also big thanks to Steve for helping me getting the mighty 'PUG' fixed. Just taken her for a retest and she's passed with only a couple of minor advisories.
Thanks again!!
Andy
Thanks again!!
Andy
- Attachments
-
- image.jpeg (101.85 KiB) Viewed 1294 times
Keeping "PUG" in the Club
1966 Plymouth Fury III
1966 Plymouth Fury III