Yeah Carl....still working as usual...no secret with getting her done mate. I just get stuff done when Mrs B at work and kids at school etc so I get peace and quiet! Its amazing what you can get done in an hour or two here and there
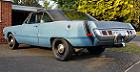
Bit more done in the trunk today. Bit fiddly but cut and shaped the passenger side floor section and got it welded in place. Few little awkward bends to finish up and a little bit more to weld on that section before I start to make up the drop off end sections. Ive cut the outer lower rear quarter section out so I can replace it and get access to the floor lip to weld the drop off section on. Ran out of time now and working this weekend so will do a bit more Tues morn.
Cheers and I appreciate all the support and encouragement....
Steve
Attachments
20140411_144017.jpg (132.22 KiB) Viewed 574 times
20140411_123938.jpg (188.16 KiB) Viewed 574 times
20140411_130144.jpg (173.34 KiB) Viewed 574 times
20140411_121011.jpg (154.84 KiB) Viewed 574 times
Last edited by Steve on Fri Apr 11, 14 10:18 pm, edited 2 times in total.
Ive just thrown some filler and primer on to seal the panel so it doesnt rust. Before I finally paint it, I will fill it properly and sand it nice and flat etc for a better finish
Busy week on the Fury....getting on with the bodywork still...
passenger side drop off section in, outer rear lower quarter in and all filled, block sanded and primed up.
Made up an infill section for the rear corner of the lower quarter. Was a bit awkward to weld in but got there. Thats all filled and prepped.
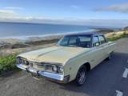
Started sanding the roof. All the glue from the old vinyl roof is off so I just need to wait for a really still day to prime it and sort out any blemishes etc. Ive discovered Top Stop gold filler...fantastic stuff to work with! The unprimed quarter pic was taken after the first layer of P38 was sanded so its a bit rough. Followed this with four coats of top stop, each guide coated and block sanded so now very smooth and ready for paint.
Must say this bodywork lark is very labour intensive
cheers Steve
Attachments
20140420_181202.jpg (131.03 KiB) Viewed 516 times
20140420_101528.jpg (125.74 KiB) Viewed 516 times
20140414_194639.jpg (136.93 KiB) Viewed 516 times
20140414_190805.jpg (156.33 KiB) Viewed 516 times
Last edited by Steve on Mon Apr 21, 14 8:14 pm, edited 1 time in total.
your well marching on with that steve. i dont think you have done much of this work before ??? but what you have done and your enthusiasm is incredible well done,..
listen you have done a bit off everythin now why not have a go at a bit of a trick paint job on the roof, go get some white with metal flake or whatever they call it these days you only dust that stuff on then cane it with lacquer i really think you could pull it off and that sort of finish really suits thesse old square roof yanks............ have a think on it,
Yes mate...off white an option and red...I even saw a pic on the net of a silver roof which looked surprisingly good! Lots of choices...red wheels cream top etc...sticking with black wheels, black top and dog dishes or chrome lugnuts for now
Never done anything like this before as you say but always wanted to have a go. Its great fun, lots of time, but having a blast! Everything takes me ages...like the top coats of filler. I want a nice result so Im doing it once, guide coating and sanding, then finding imperfections so doing it again, same thing and after four times Im happy with it. Some tiny bits to sort before paint. Still got to do the drivers side trunk floor and lower quarter then on to some wiring and brakes for MOT.
thats a cool idea for the roof....mmm...probably need some Cragars or something to pull that one off. Could look great though.....