Page 1 of 1
Paint on the underside of your car
Posted: Mon Jan 20, 14 10:55 am
by GJUK
What is yours sprayed in?
My Dart is totally original under the car, no floor pans or welding at all. At the moment there is a light coat of a fine black paint under the car, thinking of covering it with stone chip or similar.
What are yours painted with?
The car won't be used often in the rain, summer use only.
Thanks
Jon
Posted: Mon Jan 20, 14 1:21 pm
by morgan
I scraped off the whole thing over the course of a winter (long job). Mine had been undersealed at some point in its past, which seemed to have done the job. Couple of patched bits from YEARS ago, but thats all.
Once clean I used POR15 on the metal bits like frame rails, stonechip undergaurd (spray type) for flat surfaces and waxoyl in the crevices.
Stonechip stuff sticks well and can be scraped off in future generations if required. Seems good to me... Although like you, it wont get wet often.
Picture 'scraping'. Man its all coming back to me. It was quite nice under there actually - I fell asleep at least once. It was peaceful...
Posted: Mon Jan 20, 14 2:44 pm
by Dart Vader
Jon
Not all Mopars had underwear, mine doesn't have any.
But whatever you can put on is going to be better than what's one it as it's probably old and crusty.
It's a nasty messy job.
There is a thread on stripping underwear
Dv
Posted: Tue Jan 21, 14 6:38 am
by autofetish
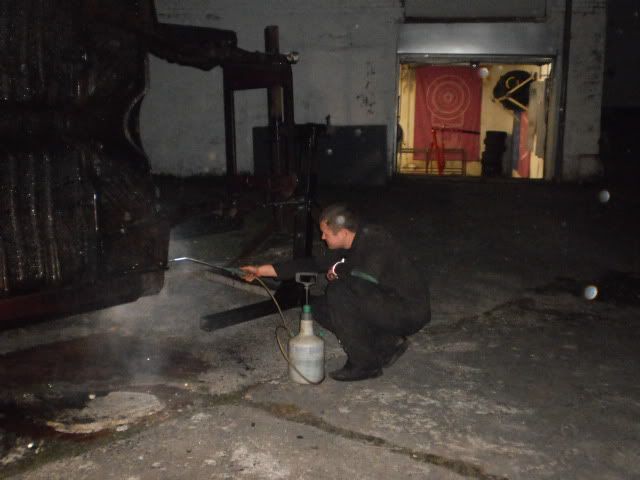
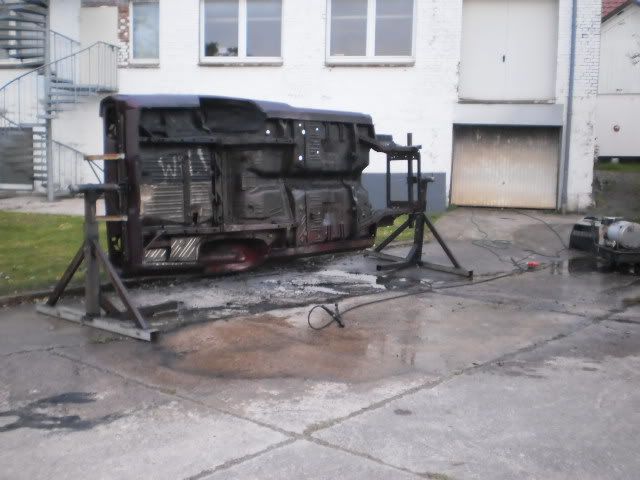
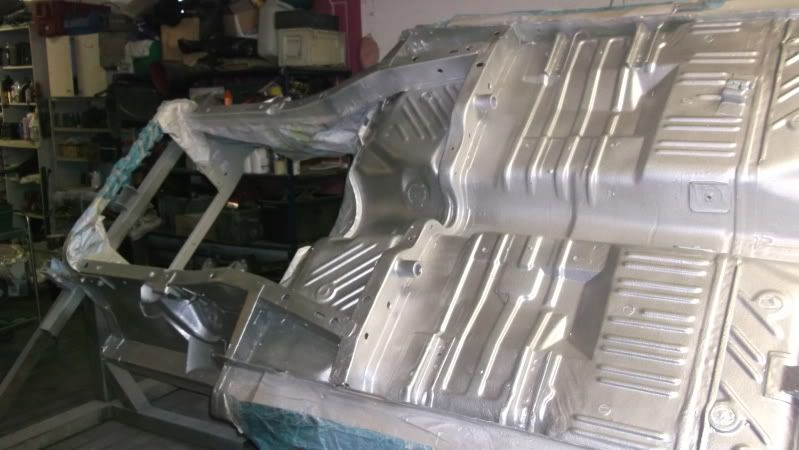
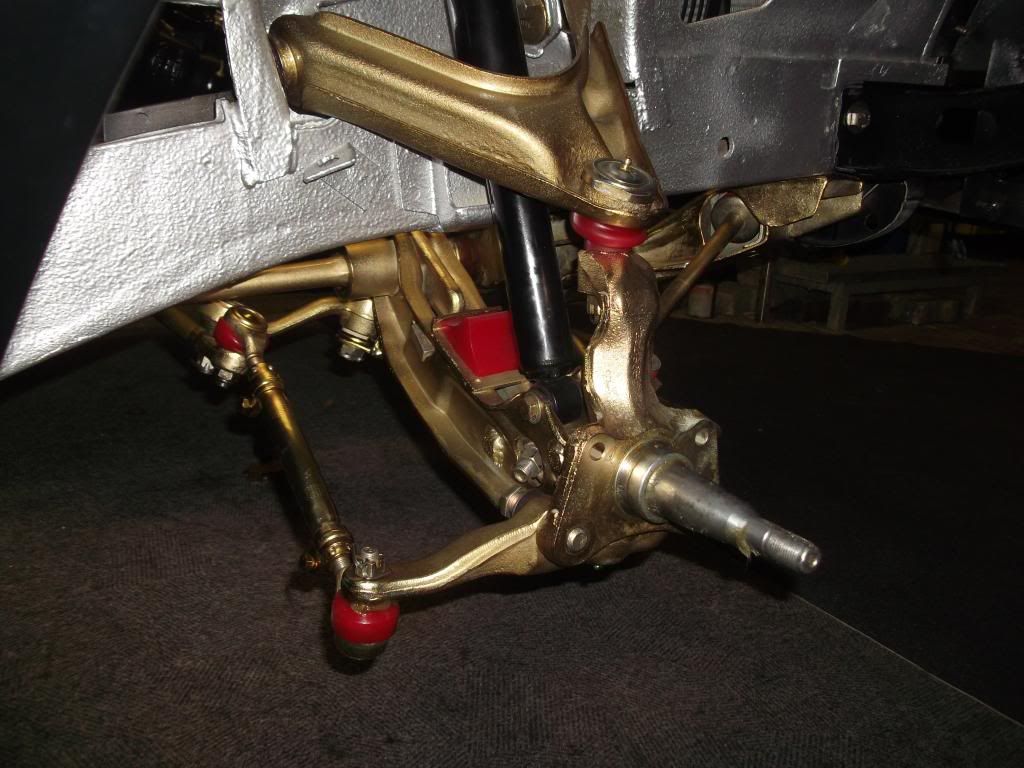
I sprayed 50l of diesel at the underside of the car.
With a 200 degree 200 bar jet Bananarama! came off like hot butter.
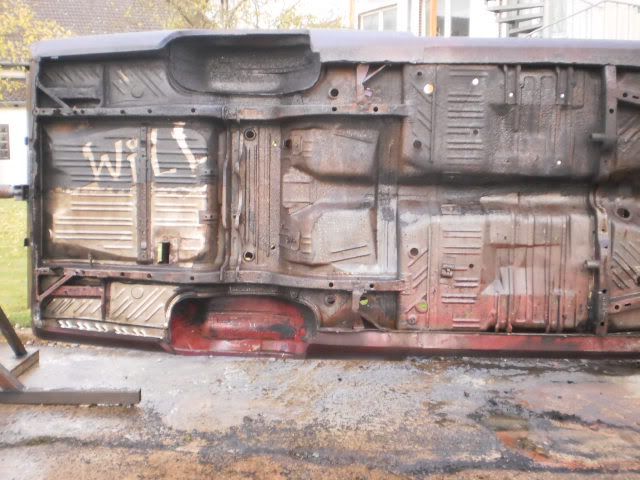
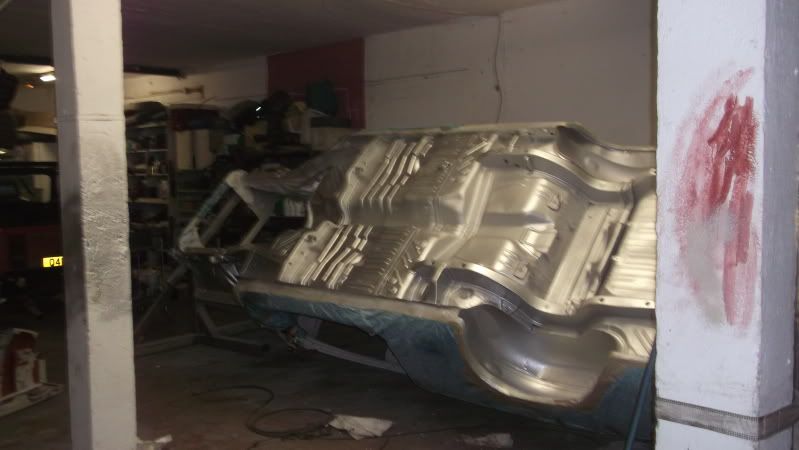
Sand blasted it to bare metal
2k etch primmer
3m seem sealer bushable
3m stone chip over spray-able in a shussllleee gun
chrome affect mirror paint
2k scratch resistant clear coat x 5
Good luck

<a href="
http://photobucket.com/" target="_blank"><img src="
http://i73.photobucket.com/albums/i205/ ... e032-1.jpg" border="0" alt=" photo Picture032-1.jpg"></a>
<a href="
http://photobucket.com/" target="_blank"><img src="
http://i73.photobucket.com/albums/i205/ ... ure037.jpg" border="0" alt=" photo Picture037.jpg"></a>
<a href="
http://photobucket.com/" target="_blank"><img src="
http://i73.photobucket.com/albums/i205/ ... ure046.jpg" border="0" alt=" photo Picture046.jpg"></a>
<a href="
http://photobucket.com/" target="_blank"><img src="
http://i73.photobucket.com/albums/i205/ ... /027-2.jpg" border="0" alt=" photo 027-2.jpg"></a>
<a href="
http://photobucket.com/" target="_blank"><img src="
http://i73.photobucket.com/albums/i205/ ... /028-2.jpg" border="0" alt=" photo 028-2.jpg"></a>
<a href="
http://photobucket.com/" target="_blank"><img src="
http://i73.photobucket.com/albums/i205/ ... e006-1.jpg" border="0" alt=" photo Picture006-1.jpg"></a>
Will
Posted: Tue Jan 21, 14 6:50 pm
by MattH
That's pretty stunning Will. Great job.
Mine was all blasted and primed with red oxide, then Isopon Zinc 182 and then a gloss grey enamel brush painted on.
It sort of looks like the original primer only effect but has some proper protection on it. I'm more wanting longevity than factory finish.
Posted: Tue Jan 21, 14 6:51 pm
by MattH
That's pretty stunning Will. Great job.
Mine was all blasted and primed with red oxide, then Isopon Zinc 182 and then a gloss grey enamel brush painted on.
It sort of looks like the original primer only effect but has some proper protection on it. I'm more wanting longevity than factory finish.
Posted: Tue Jan 21, 14 7:08 pm
by Pete
Missed an opportunity to mini-tub that, Will!!!
Hope you did not have the EPA chasing you..
Great work!
Posted: Tue Jan 21, 14 9:02 pm
by autofetish
Pete wrote:Missed an opportunity to mini-tub that, Will!!!
Hope you did not have the EPA chasing you..
Great work!
I know but i really didn't like the idea of that cut you have to make into rail for spring inboard.
At least this way when i grow up and become a purest i can take it all back to original
