Got my new master cylinder from Rock auto and decided I'd fit it straight away.
Instructions said to bench bleed which always sounds like a dark art on the ' net. in fact it was a doddle. Plugged both outlet holes of new m/ c and filled it full of fluid. Got a dowel that fitted into the m/c to act as a brake pedal push rod and then pumped away watching bubbles for about half an hour.
eventaually I couldn't push any more bubbles out.
Ten minutes to change new m/ c for old, start up the motor and the brakes work a trat. no arsing about bleeding each wheel cylinder, just drove her down the road.
Job's a good' un
Good work mate and I recently fitted one to my Polara.. I bled it exactly as you did and fitted it only to find very little brake pressure and really snatchy braking. Whipped it off again and bench bled again and loads more bubbles came out.......learning point....as per your description, keep pumping the cylinder with the dowel until you are happy absolutely all of the bubbles are out! I wanged it back on and worked perfectly!!
Sorry to jump on your thread but I need some help or advice.
I am about to undertake a rebuild of an Aussie master cylinder and went to Pirtek to try to get some fittings to make the pipes to bench bleed. They could not find anything with the correct thread. - I think they mostly have metric fittings.
Any suggestions as to what fittings to get and where from?
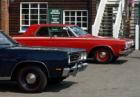
The Aussie MC upto 1970 is based on a Dart (or other mopar) MC of the late 60's, it seems just the ports are on the opposite side.
Like this one in the pic
Was thinking that I could try to bodge it with a piece of clear hose through the middle of a cork and cut the cork down to screw/push into the thread far enough to cause the hose to flare over the pipe fitting.
Or as a last resort use the idea Dave999 came up with when we were talking about it last weekend. submerse the whole MC in a container of brake fluid then pump it. - My reservation with this is that the MC will be vertical and not be on the horizontal as it is when mounted, when pumping this may cause some air to get trapped around the seal if it is higher than the internal ports to/from the bore.
That master cylinder looks just like the new one I bought for my Polara. It was £50 brand new and came with plastic blanking plugs for the outlets for use when bleeding. If you want, I can dig out the plugs and send them to you to try???
You may be worrying too much. In my case there were no tubes or total immersion in fluid etc..
I simply plugged the two ports with supplied plastic caps.
Filled M/C with fluid and wedged it roughly horizontally on my bench as I didn't have a vice.
Used a homemade dowel and gently pushed it in about .75" and gently out again
. Left approx 15 secs between each go.
Bubbles came out, fluid level slowly dropped as it filled the internal channels of the cylinder. Top up as required.
Wait until ALL bubbles go and can hardly Bananarama!.
Carry to car and install.
Drive on.
Are they just plugs to stop fluid exiting or are they hoses to recirculate the fluid.
I thought you had to recirculate the fluid... at least that is how my workshop manual shows it being done.
Like previous answer mate, do exactly as described which is how i did it. Just bland off both outlets and get pumping as they say! Your new cylinder should come with plastic plugs screwed in. If you
PM me your address I will dig mine out and post to you,
Did ours at the weekend too. Followed the FSM instructions and pumped away.... (cue Ade/Dunc ) for ages till the bubbles stopped appearing - or that was the plan but they didnt stop
Checked the piece of paper that came with the master cyl and it said to only depress the piston by 3/4 to 1" but not more than 1". And to continue until you cant push any more. So tried again and eventually got more resistance but the bubbles didnt go away completely.
As we also needed to bleed each brake we fitted it anyway and figured any more air in the system will come out when we do the rest of the brakes...
No new Aussie MCs of this type seem to be made.
Am going to put a kit through one of my MCs. Has the 1" bore like the US ones so have a rebuild kit from Rock Auto... no plugs though.
Dave999 wrote:yours will probably have the danger danger valve in it as well
Dave
Hi Dave.
Nope, mine is not in the MC. Located on a separate block that does the warning and splits the L & R front.
Your 'modern' VH ones have it all bundled into the MC I believe.
RobTwin wrote:Did ours at the weekend too. Followed the FSM instructions and pumped away.... (cue Ade/Dunc ) for ages till the bubbles stopped appearing - or that was the plan but they didnt stop
Checked the piece of paper that came with the master cyl and it said to only depress the piston by 3/4 to 1" but not more than 1". And to continue until you cant push any more. So tried again and eventually got more resistance but the bubbles didnt go away completely.
As we also needed to bleed each brake we fitted it anyway and figured any more air in the system will come out when we do the rest of the brakes...
I'll be fitting a pair of calipers that I just rebuilt so will also be bleeding the whole system... just don't fancy spending hours trying to bleed at the wheels so want to bench bleed the MC properly or as best as I can.