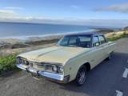
Steves 66 Sport FuryIII
Moderator: Moderators
That's fine. But what happens when it's finished ???Steve wrote:was always the plan matey...use the Polara in summer, do the shows etc then back on it when Winter hits....where is the sense in that eh?!!
Sell it on for another project ?
It's all about Smiles per gallon !!!
68 Coronet sedan 500 4 door
Dodge Ram SRT 10
MMA-013
68 Coronet sedan 500 4 door
Dodge Ram SRT 10
MMA-013
That would be nice....probably stick with older C bods as Im starting to know what to look for now but not going to be too rigid. Got to get this car done first or Mrs B will quite rightly go bonkers! I would be in serious trouble if I had some space to store cars!!! 
Bat Girl Stalker Living Petes Dream
Day off work today but bleedin weather has stopped me doing much....
Been concentrating on the indicator system as there are a few gremlins in there. Decided to go right back to basics and completely rewire the whole circuit.
Firstly, removed cleaned and tested the indicator switch and seems all good. Worked out that the best way to test is to do a continuity test on the switch in various positions. Set the multimeter to the audible continuity test settings and, from my wiring diagram, worked out that the DARK GREEN and LIGHT GREEN wires feed the left hand indicators and the DARK BROWN and TAN wires feed the right hand indicators.
With the switch in the central position, there shouldnt be any complete circuits so no indicators illuminated. In this position, a continuity test between both pairs of wires should be negative (no sound). If it beeps, the switch is faulty. Click switch down (left) and the circuit to both green wires should be complete. Test with meter to both wires and beep from meter. Good so far.... click switch up (right) and do same test on brown and tan wires....same result so switch seems ok.
Next, I have run new single wires from all four corners to the area where the switch connects into the cars wiring ready to be joined to switch when replaced.
Didnt want to use the old fittings in the bulb holders so I snipped the wire, released the spring and plastic plunger that contacts with the base of the bulb. Put a small, snug fitting bolt through the plunger and put a single plain nut on the back. Next, put a ring connector onto the main wire from the switch, crimp, then strip off the plastic insulation. If you leave it on, it makes the new connection too thick and the spring wont depress enough to allow the bulb to stay in.
Next, put the ring connector onto the bolt, attach it with another nut, then bend the ring connector down onto the side of the nuts. Slide a piece of heat shrink up over the nuts and onto the plunger and now you have a new wire directly to the bulb which is insulated from the casing (earth).
I then attached separate earth leads to the outer casing of the holder to run to an earth point on the trunk next to the bulb holder housing. To test the earth lead, put a bulb in the holder, then do a continuity test from the side casing of the bulb and the end of the earth lead. If it beeps, the earth is good. Final test, continuity test from the bolt head that will contact with the nipple on the bottom of the bulb and the end of the wire to the switch....
Finally, I have had to make up some front indicator bulb holders as per pic. The insides are same as described above, with a bolt replacing the original dodgy connector.
The earth lead pic is just for illustration, I will wire wool the casing clean before final installation to make sure of a good earth.
Next job...fit it all when I get a dry day!!!
Cheers Steve
- Attachments
-
- New front indicators.JPG (183.66 KiB) Viewed 863 times
-
- New fitting indicator.JPG (111.39 KiB) Viewed 863 times
-
- bolts etc indicator.JPG (120.43 KiB) Viewed 863 times
-
- indicator 1.JPG (147.99 KiB) Viewed 863 times
Bat Girl Stalker Living Petes Dream
Got lost in a mopar dream world today, messing with wires etc and finally getting somewhere!
Had to strip my indicator switch down, clean it and reassemble it as there was some crud in there. Works fine now. All indicators relocated to the reverse lights and working. Just a small problem with the slow flash rate but hope to be sorted when I receive an electronic relay (thanks Bryan) from Ebay next week. Just got to tidy the wiring up and I can bang on with fitting the new carpet and reinstalling the interior. Then its MOT time!!
I have also moved the side lights out of the indicator circuit (they were in the indicators which isnt legal here). I made small looms up to plug into the existing sockets on the indicator wiring and ran the new wires to the new holders in the new Autopal headlamps. Other end to earth. Works great!!
Was hoping to get all the housings back in tomorrow but the dreaded work has put an end to that till Monday morning...
Cheers Steve
Bat Girl Stalker Living Petes Dream
Managed a few hours on the Fury this weekend....after loads of messing around, Ive had to bite the bullet with the indicators. New switch on its way from the States.
While I am waiting, I finished off all the vapour barriers on the doors and rear passenger area, finished fitting new fuzzy strips on the door cards and re fitted them. I have also started fitting the new carpet. Finally, changed plugs, flushed cooling system and refilled with antifreeze and made a start on getting the crazing out of the paint on the drivers rear quarter.....
Quite a productive weekend
cheers Steve
- Attachments
-
- Carpet and doors 1(2).jpg (184.08 KiB) Viewed 754 times
-
- Rear quarter full panel(2).jpg (248.43 KiB) Viewed 750 times
-
- Rear quarter 1(2).jpg (181.09 KiB) Viewed 750 times
Bat Girl Stalker Living Petes Dream

You cannot hide it from them, they know everything that goes on! The smell of paint, dye, grease, petrol, jizzum etc will give you away. No use lying when she asks what the smell is, there will be evidence and you can bet your life she will find it.
By the looks of it you have got dye or over spray on the radiator already, was nice knowing you mate.
By the looks of it you have got dye or over spray on the radiator already, was nice knowing you mate.
Petty Roadrunner 416 Stroker 4 Speed
*MMA-609*
"Built to be driven!"
Why me???
*MMA-609*
"Built to be driven!"
Why me???