OK, this may be sacrilege to purists but anyway here goes for the minimally-invasive-surgery method to replace the coreplug in back of cylinder head just in front of bulkhead.
VE Valiant right hand drive, with 273 small block. Core plug at back of right cylinder head leaking. I posted a request on how to replace it seeing as almost impossible to reach, and the solutions suggested were
(i) take head off and (ii) remove engine.
Car all ready for the summer after 2 years of work. Not in the mood for either really. No oil leaks at all. I was asked to describe how I sorted it out, so here it is as I may have come up with a new keyhole surgery method.
1) Remove driver's seat.
2) Remove brake master cylinder.
3) Remove rocker cover.
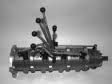
4) The core plug can now be felt just level with exhaust manifold on back end of cylinder head. To actually see it use a dental mirror (Maplins sell them) with a pentorch.
5) Use creases and holes in bulkhead to work out where you could drill a hole so it would exactly line up with the core plug. Get inside car and mark out the same spot, using same folds in the bulkhead metal as your reference points. Cut corner off the cardboard/foam insulation panel with a Stanley knife.
6) Buy a decent 40mm hole cutter for an electric drill, approx £30 complete with arbor that fits into the drill. Check it cuts metal.
7) Measure twice then from inside footwell of car, drill out (once) a 40mm diameter hole. Be careful, there are brake lines just above your hole on engine side of bulkhead!
8) Get very long big old screwdriver (I have one for hitting things with in tricky spaces), file end to nice clean flat edge.
9) Put it through hole so tip is resting on the left or right edge of the coreplug (lots of youtube vids on how to remove a coreplug). Hit it with small lump hammer until coreplug flips round so now edge-on to you. Water will leak out, probably good thing if it carries any crud out with it.
10) Get out of the footwell, stretch those joints, then from engine side use a pair of adjustable grips or similar (that work around a corner) to reach in, grab the core plug and wiggle it round until it comes out.
11) Drain coolant partially so no water behind the work area.
12) Use paper towel, lots of it, to absorb all the water until edge of the hole is dry.
13) Make sure hole edges smooth as well as dry, use emery paper if required.
14) Hammering in new plug: Some people say do not use any sealant, others say it is OK. I am using it to help the plug go in as will be tapping it in from an awkward position, i.e. the footwell, to make life a bit easier.
15) Fit a socket to end of a long socket extender bar and use flat layer of blu-tack inside the core plug to stick it to end of the socket.
16) Crawl back into the footwell and, with pentorch taped to the socket extender bar, go for it and tap the new core plug into place bit by bit. Keep going round to engine bay and checking how evenly it is going in, and which angle you need to tap to get it in nice and level. Take your time, do it bit by bit, get it right first time! Rather than tapping I ended up having to hit mine pretty hard.
17) Fit 40mm rubber blanking plug to hole in bulkhead (ebay).
18) Put everything back together, bleed the brakes, refill with coolant.
This took me about 6h of work including 2 trips to the industrial estate for tools and bits.
Another way I have heard of, a rumour from an obscure forum in US was to use a 90 degree angled electric hammer called an "Auto-Hammer" which will just fit in gap between bulkhead and back of cylinder head. However it is only available in the US, was not a market success, BUT might just be great for this specific job.
John
Trans-bulkhead coreplug replacement (keyhole surgery method)
Moderator: Moderators
Trans-bulkhead coreplug replacement (keyhole surgery method)
- Attachments
-
- Stick plug to socket on socket extender, drive it into place through hole in bulkhead while lying in the footwell.
- 4.JPG (54.32 KiB) Viewed 973 times
-
- Pull out coreplug, prepare new one, blu tack to hold it to end of driver socket
- 3.JPG (107.02 KiB) Viewed 973 times
-
- Hit edge of core plug and flip it round
- 2.JPG (85.22 KiB) Viewed 973 times
-
- Remove seat, prepare drill with 40mm cutter, cut the hole.
- 1.JPG (83.84 KiB) Viewed 973 times

Here is a pic of the Nextec "Auto-hammer" I mentioned above.
Probably not that great as a regular hammer but just possibly ideal for hitting something when working around a corner or coming in at an angle.....like core plugs in impossible spaces.
Probably not that great as a regular hammer but just possibly ideal for hitting something when working around a corner or coming in at an angle.....like core plugs in impossible spaces.
- Attachments
-
- Pic of this electric hammer that works around corners.
- Nextec AutoHammer.JPG (18.11 KiB) Viewed 945 times


-
DaveMadders

- Posts: 671
- Joined: Wed Mar 02, 05 4:46 pm
- Location: Sth Manchester, Ooop North
-
autofetish
- Posts: 5599
- Joined: Sat May 21, 11 6:43 am
This tool is used / designed for aircraft rivots.XenonJohn wrote:Here is a pic of the Nextec "Auto-hammer" I mentioned above.
Probably not that great as a regular hammer but just possibly ideal for hitting something when working around a corner or coming in at an angle.....like core plugs in impossible spaces.
The closer you are to death the more alive you are


-
MilesnMiles
- Posts: 7309
- Joined: Fri Nov 04, 05 8:40 pm
- Location: Cornwall
Thanks for the feedback.
Regarding the thin bulkhead metal, I bought an expensive hole cutter only to find it went through like a knife through butter. One of those bendy B & Q ones would probably have been fine.
I think if the one behind the bellhousing went I would have to gracefully admit defeat!
Regarding the thin bulkhead metal, I bought an expensive hole cutter only to find it went through like a knife through butter. One of those bendy B & Q ones would probably have been fine.
I think if the one behind the bellhousing went I would have to gracefully admit defeat!